Mobile Panic Button – ALERT
The Genasys Mobile Panic Button enables individuals to instantly send an emergency notification to organizational security contacts with the push of a button. When the Panic Button is pressed, an alert template is triggered, which notifies security personnel of the user’s location and status.
Security Personnel receive the alert by the selected channels within the template including SMS and Email so they can respond to the user and deploy resources specific to the incident.
Configuring the Mobile Panic Button
To configure the Mobile Panic Button feature for the Genasys Alerts App, an alert Template must be created first and set up with specific keywords (placeholders). The GEM system will automatically fill in these keywords based on the user’s mobile device information.
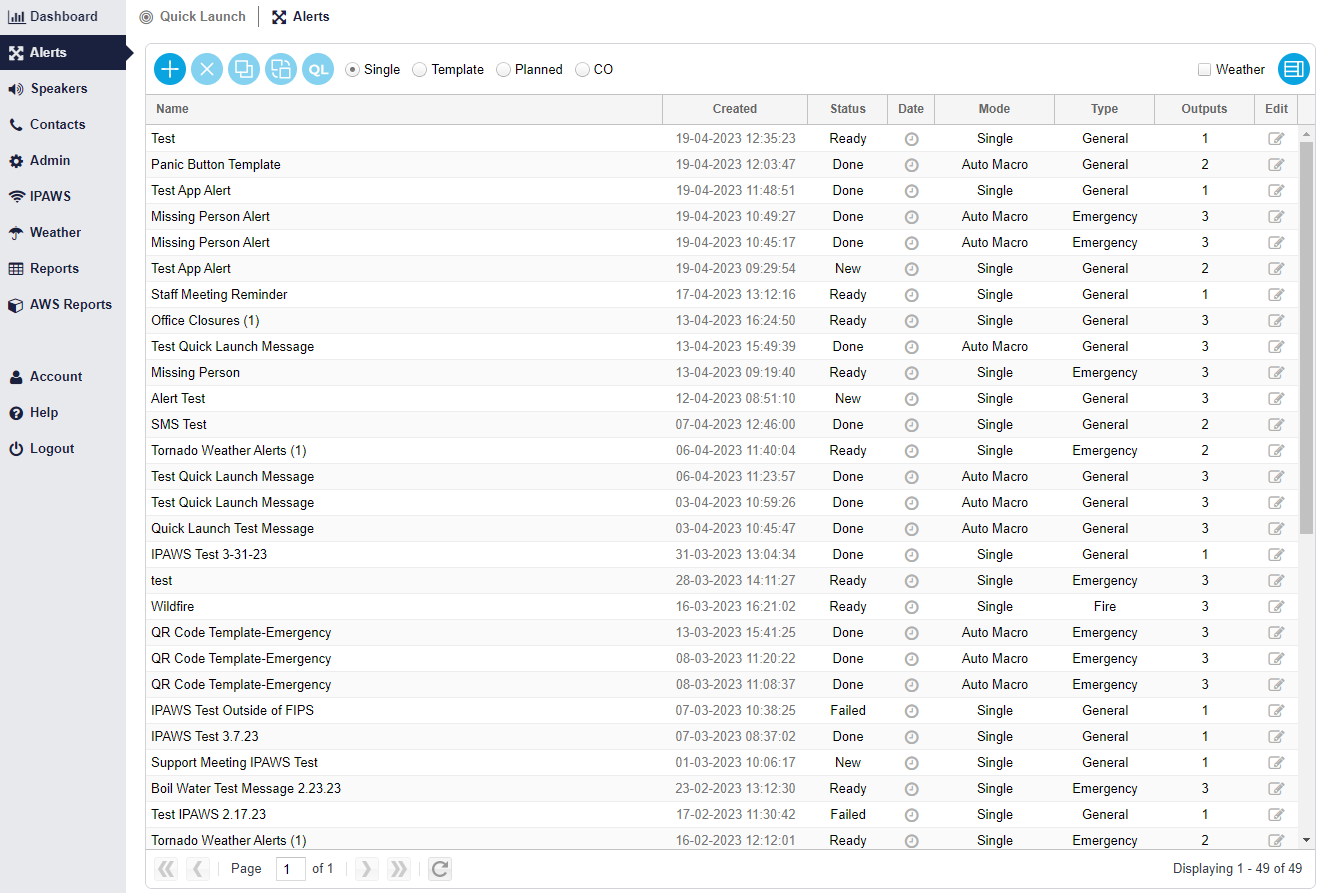
Once logged into GEM, navigate to the ‘Alerts’ menu on the left and then select the ‘Alerts’ tab.
![]()
Next, create a new Template by clicking the blue ( ) button.

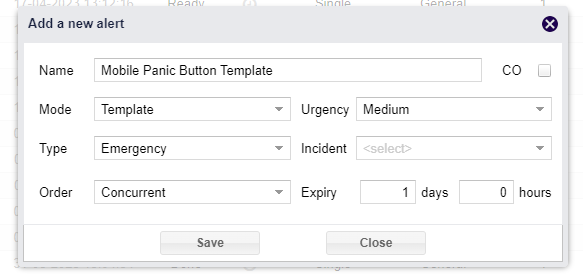 The ‘Add a New Alert’ window will open. Provide a name that signifies this template as the Mobile Panic Button as seen in the figure below. In addition, ensure that the ‘Mode’ is set to ‘Template’ from the drop down. Then finish completing the Type, Order, Urgency, Incident (Optional) and Expiry.
Once you have completed filling in this information, click ‘Save’ to continue.
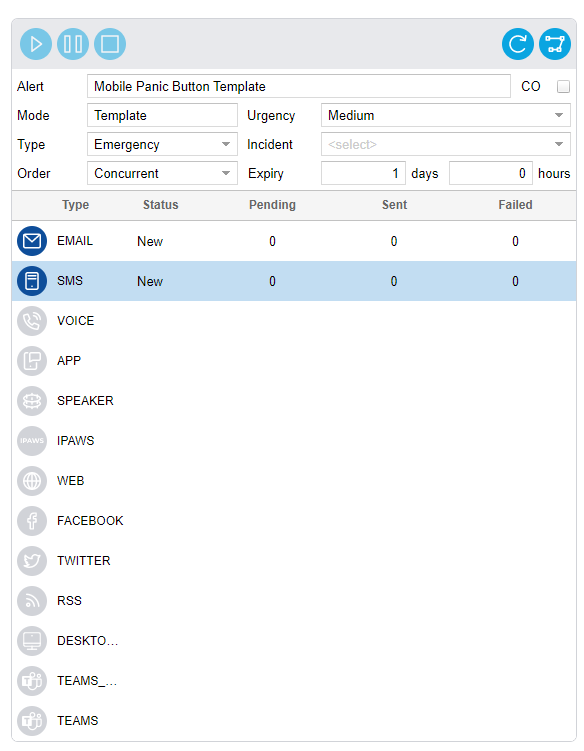
After clicking ‘Save’, the Alert will automatically open so you can select Channels, add specific message content, and select designated targets to receive the triggered alert template.
It is recommended that text-based channels be used as there will be latitude and longitude coordinates included in the message when triggered. This will be difficult to listen to over Voice calls. In the example below, Email and SMS are selected.
Next, complete the message content. This will require specific keywords (placeholders) to be included in the message content. These keywords are filled in automatically when the user presses the Panic Button. This will include the user’s name, location, etc.
See the table below for the keywords and example message content.
| {user:firstnames} | First name of the user |
| {user:surnames} | Last name of the user |
| {env:coordinates} | Latitude/Longitude Coordinate |
| {env:address} | Approximate Address |
| {env:location_accuracy_meters} | Location Accuracy (in meters) |
| {env:map_link} | Google Map Link |
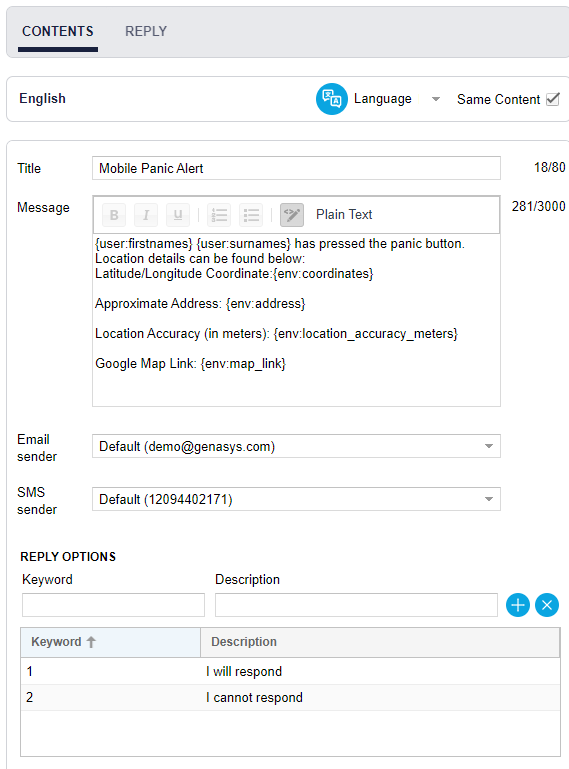
Once the message content is complete, select your designated Targets to receive the triggered alert.
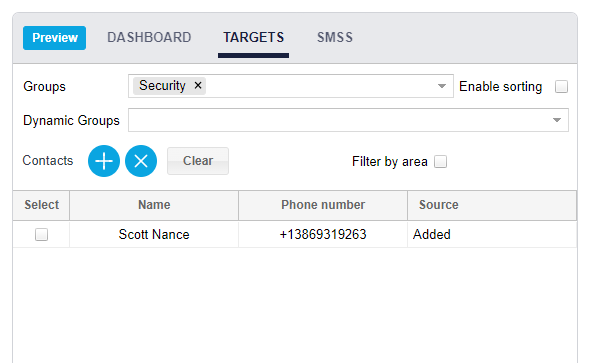
After selecting Targets, the template is complete. Select the ‘Back to Alerts List’ button at the top of the page.

Your Template is now ready. As a note, a Quick Launch does not have to be created prior for the template to be triggered.
The next step in configuring the Mobile Panic Button feature is setting up the user contact record.
Navigate to the ‘Contacts’ menu on the left side of the page.
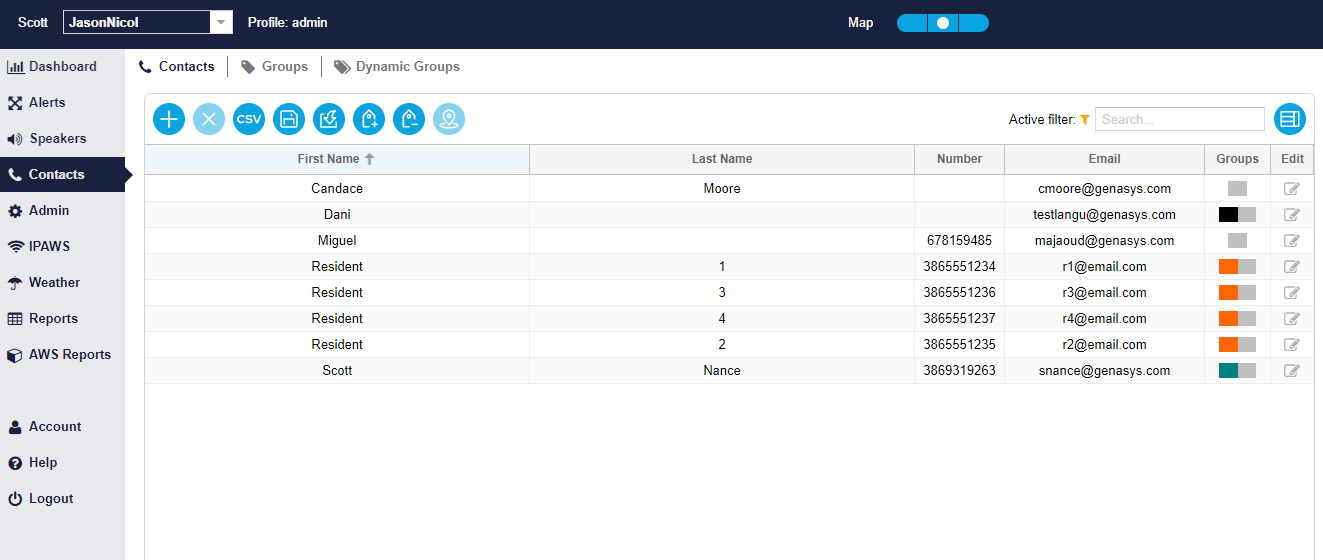
Once in the ‘Contacts’ section, double click on the contact that needs to be configured for the Mobile Panic Button, which will open their contact record.
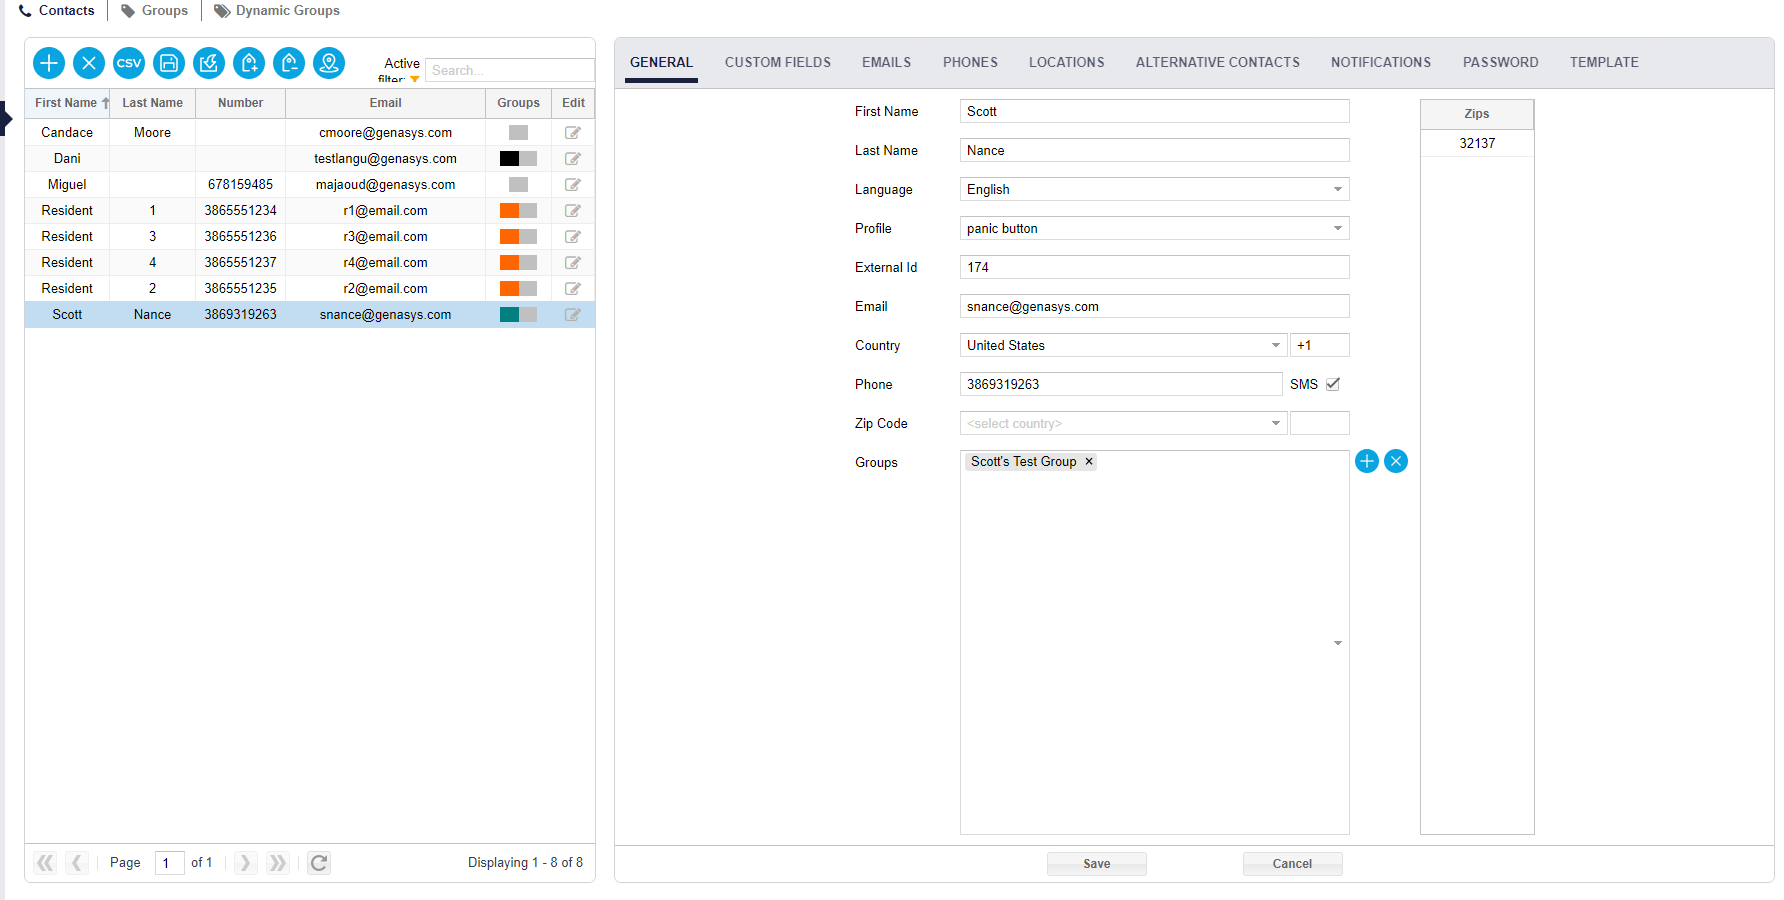
Next, you will need to select the ‘Profile’ of ‘Panic Button’ on the General tab.
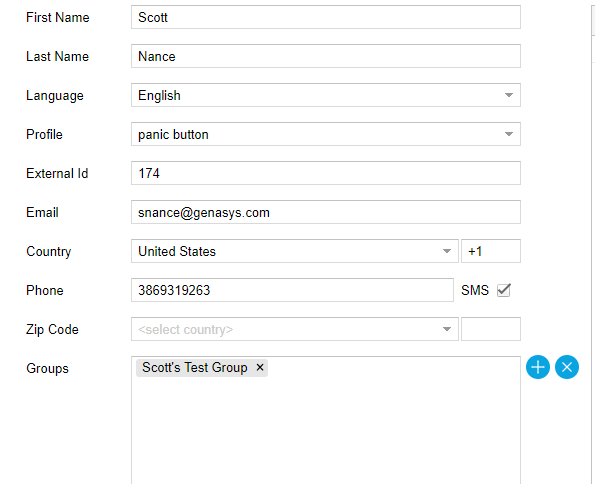
Once the profile is selected, you will then need to add the corresponding Panic Button template under the ‘Template’ tab.

After the template has been assigned, select ‘Save’ at the bottom of the contact record to save the changes. This will ensure that the contact is now configured and ready to use the Panic Button.
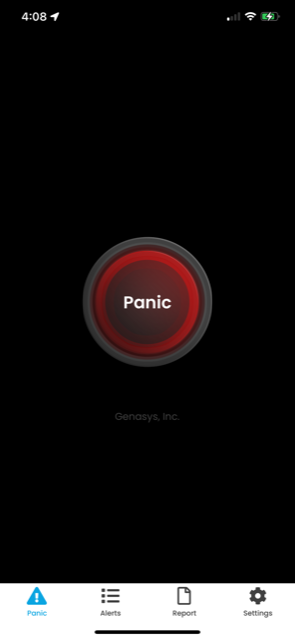 When the user (contact) logs into the Genasys Alerts app, they are brought directly to the Panic Button feature as seen in the figure below.
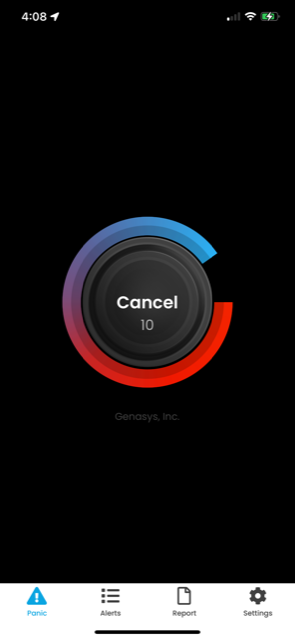 For a user to initiate a Panic, simply press on the red ‘Panic’ button in the center of the screen.
Once pressed, the user will have 10 seconds to cancel the Panic before it triggers the alert template.
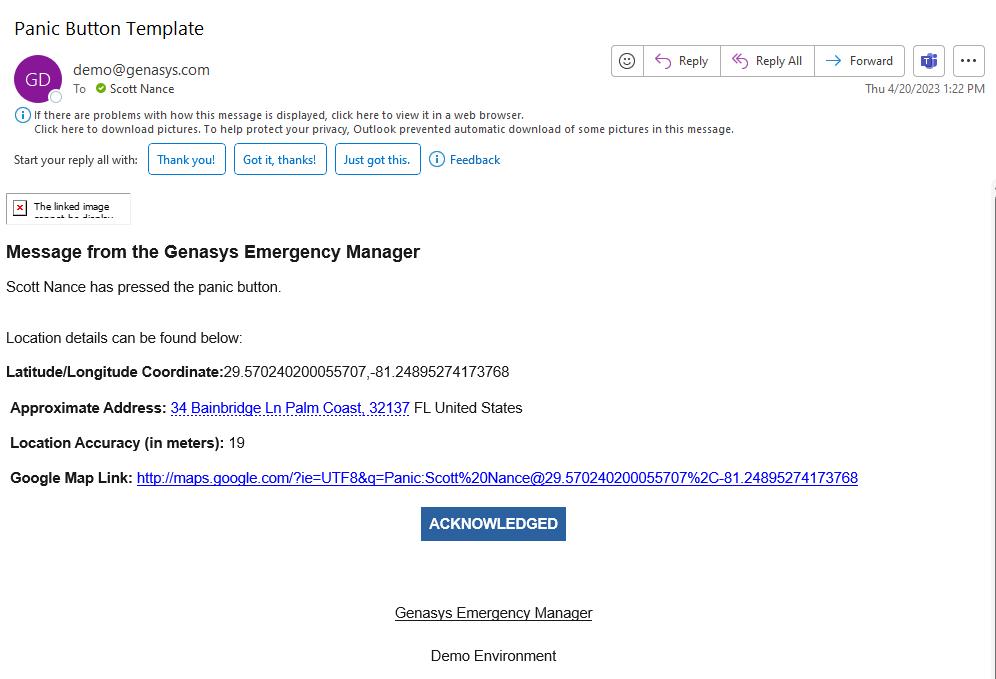
After the alert template is triggered, targets will receive the alert on designated channels with location information needed for response and assistance. The figure below is an example of a triggered Panic Alert with location information.
