IPAWS Filter Configuration
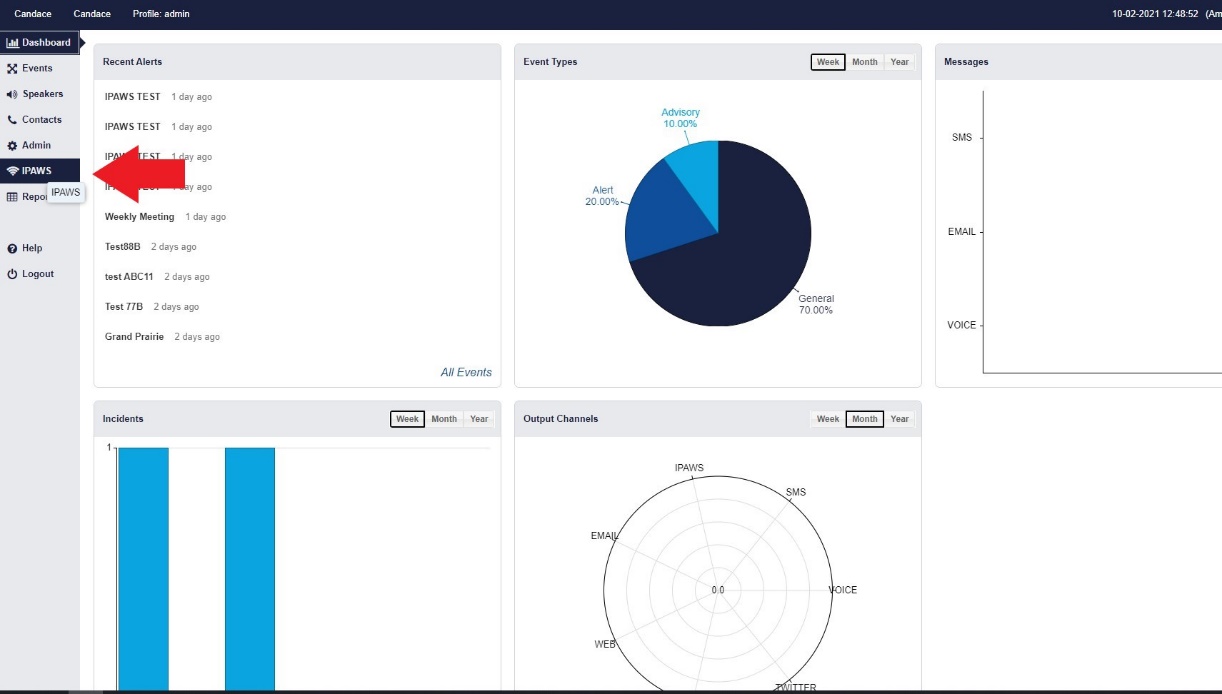
The first step upon logging in is to go to the ‘IPAWS’ section on the Toggle Menu.
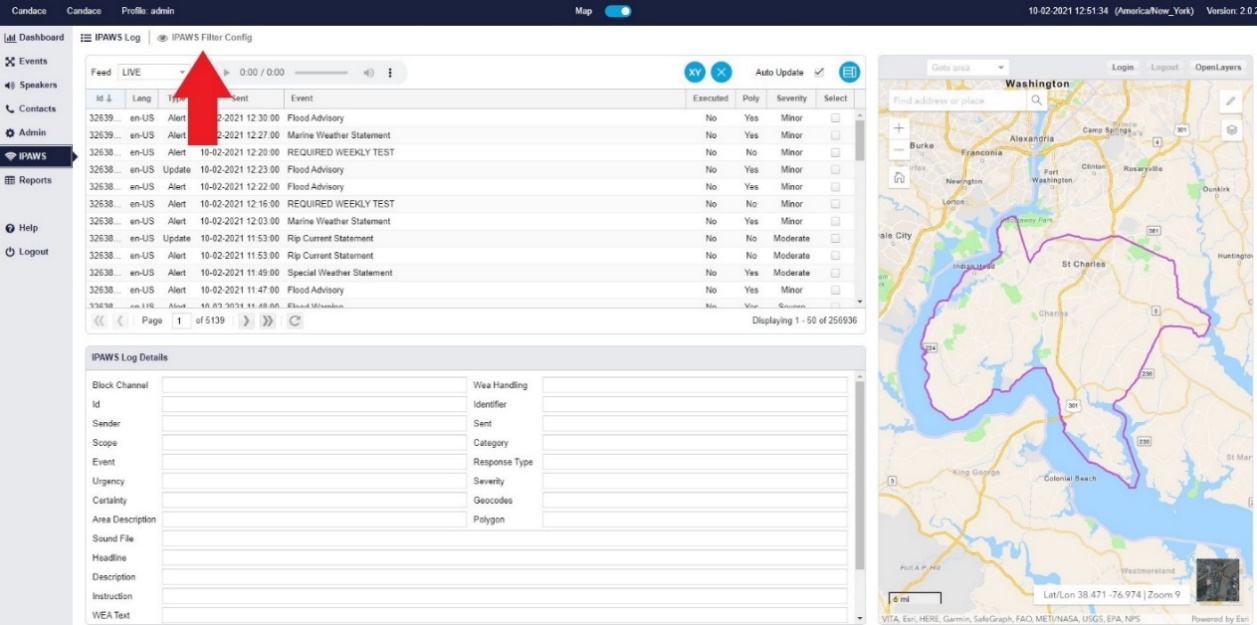
Once in that section, you will need to go into the ‘IPAWS Filter Configuration’ sub-section at the top.
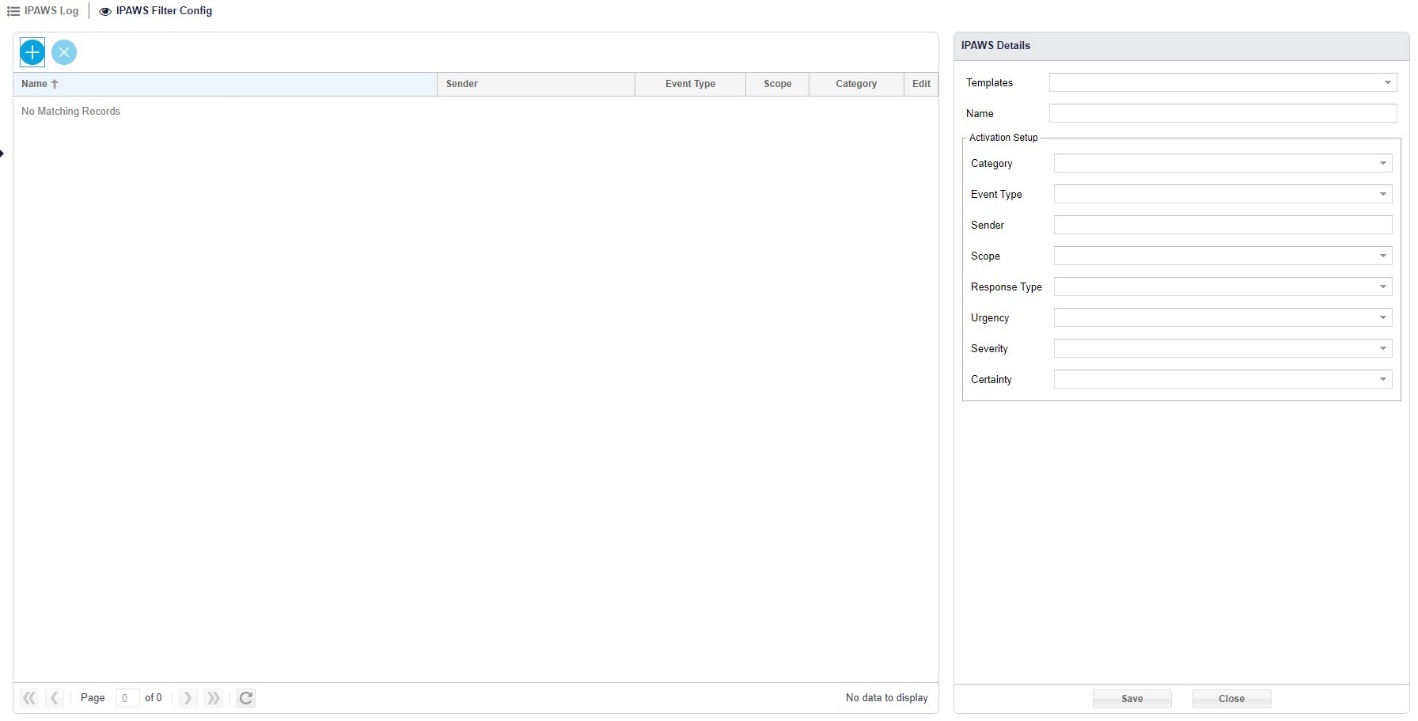
From there you will need to click-on the plus/add button (to add or edit an IPAWS Filter).

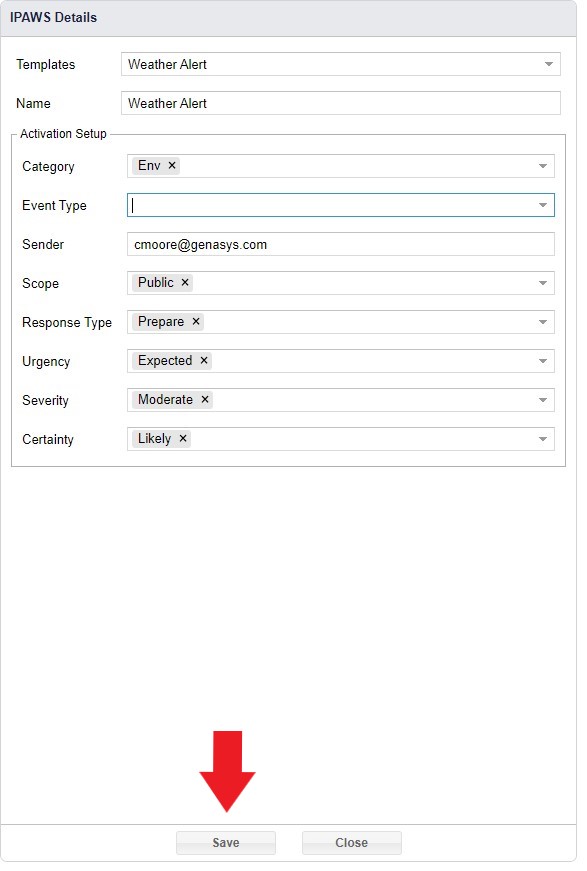
And this will open the IPAWS Details panel to the right.
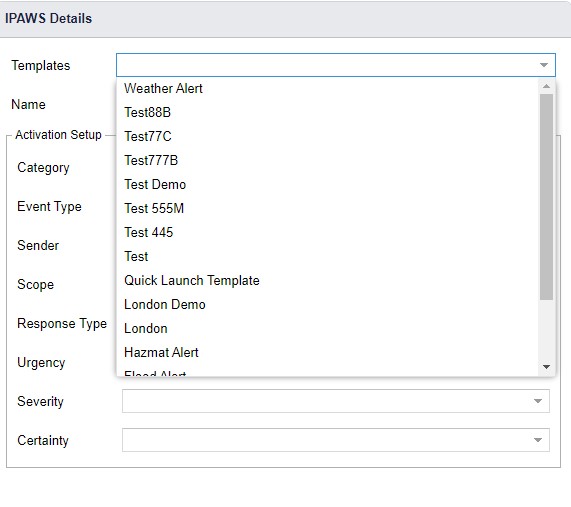
Starting at the top, you will first need to select a Template from the drop-down list. This list will be based off of pre-created templates in the system, and the selected template will be used in response to an IPAWS alert matching the activation parameters set below.
Next is the ‘Name’ text field for the filter. Below is the activation setup section, and this is where the IPAWS Filter parameters are set. For definitions on these parameters, please see our other IPAWS video; ‘Issuing an IPAWS Alert’.
After all, IPAWS parameters are set, click on the ‘Save’ button.
The new IPAWS Filter will be added to your Filter list. To edit a Filter, just double click on it, edit, and click save.

