Creating and Issuing an IPAWS Alert – V1
After logging into the system, you will need to go to the ‘Alerts’ section on the Toggle Menu and then select the ‘Alerts’ sub-section at the top.
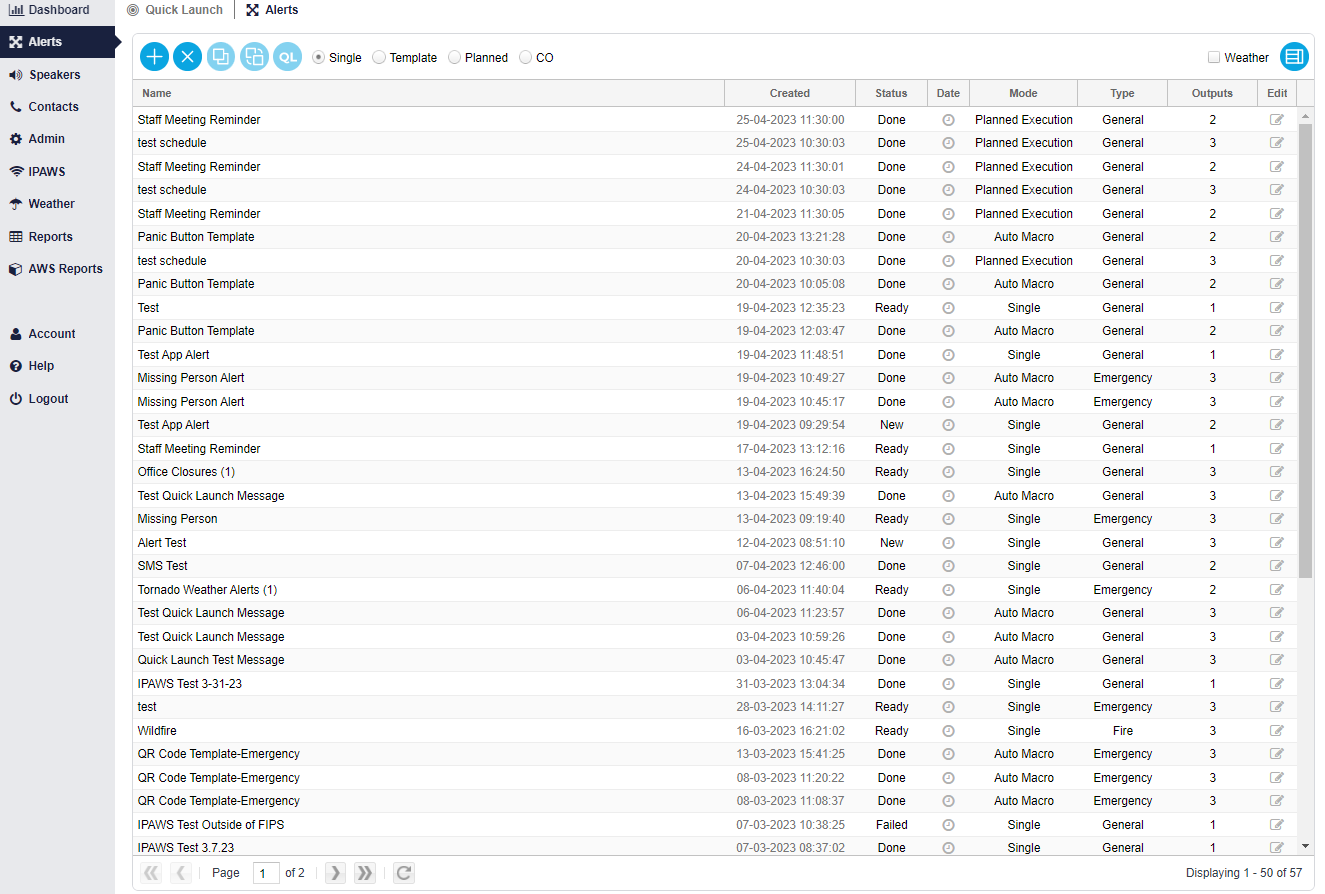
Once in the Alerts sub-section, you will need to click on the add button.

This will open the ‘Add a New Alert’ window. Go ahead and give the alert a name.

You will need to set the ‘Mode’, the ‘Type’ of alert, ‘Expiry’, ‘Order’ of the alert, and then click ‘Save’.
The alert you created will open into three separate panels. The first panel being your output channels; select the ‘IPAWS’ channel by double clicking.
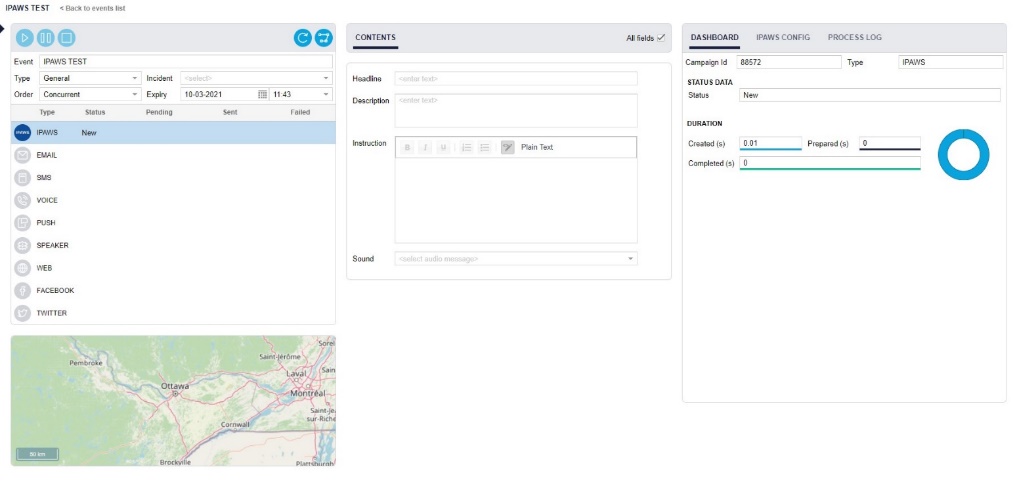
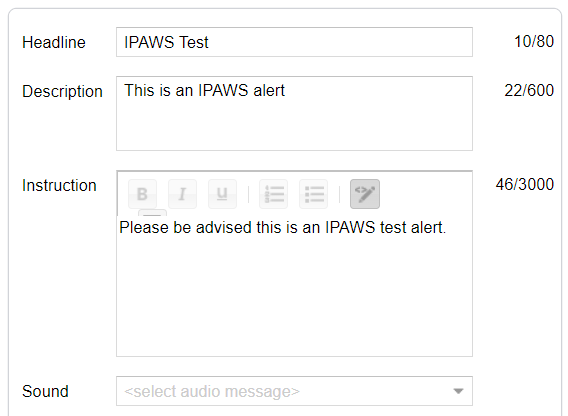
The second panel (in the middle) will become available and is for the Content or message of the alert. You will need to fill in the following text fields as they are mandatory and will highlight in red as seen below:
- Headline: The Title of the Event or Occurrence
- Description: Detailed explanation of the occurrence
- Instructions: Instructions on how to deal with the event
- Sound: An option to attach a preloaded audio file to the alert

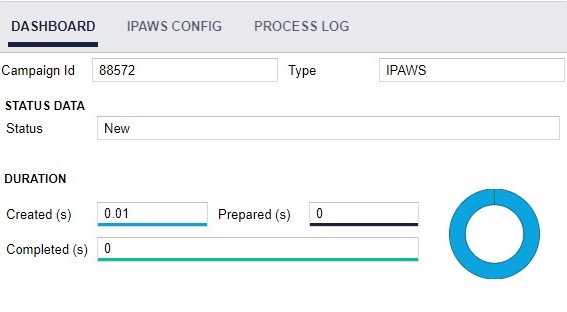
Moving onto the third panel, the Dashboard sub-section will be displayed. This will feature the following information:
- Campaign ID
- Channel Type
- status data
- duration of the alert
However, the most important aspect to an IPAWS alert will be the IPAWS Configuration sub-section. All mandatory fields will be highlighted in red as seen below.
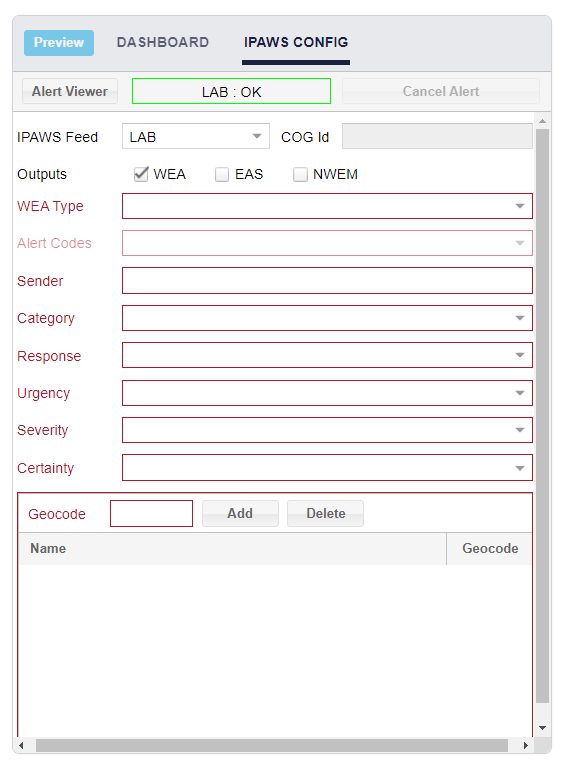
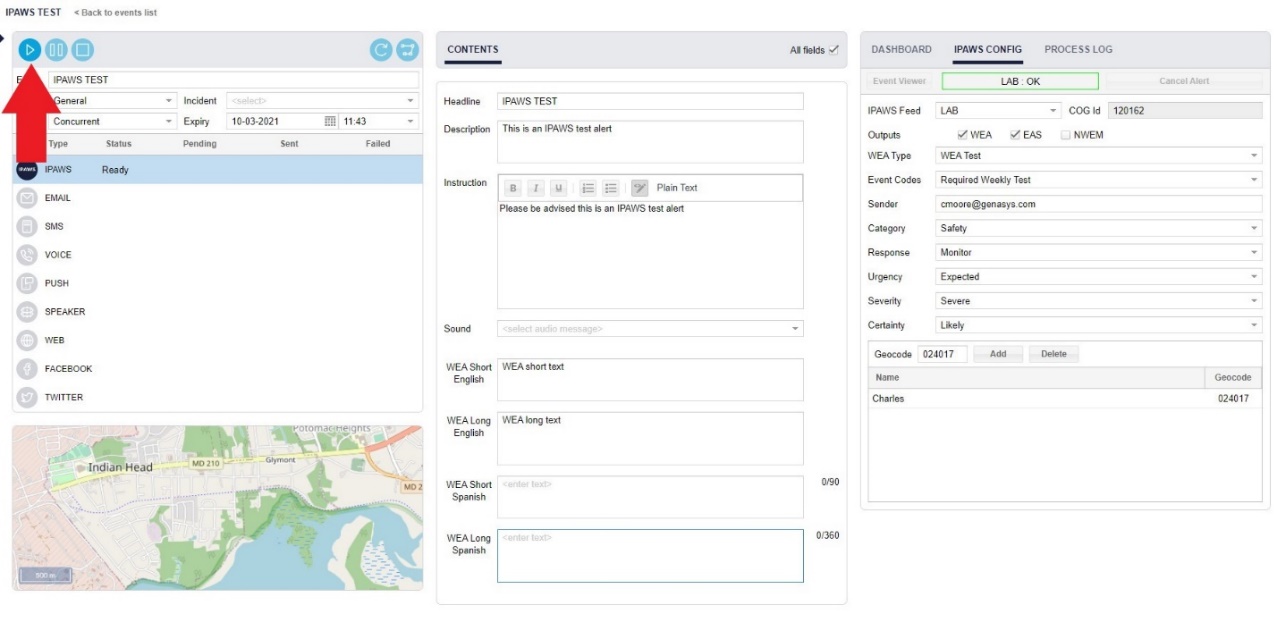
This is where you assign the posting feed, either on the LAB feed (which is a secure training portal for IPAWS users), or the LIVE feed (to send out and notify the public). If the LIVE feed is selected the panel will turn red. This is used as a precautionary measure to notify users that the alert is going out.

Next you have the COG ID (Collaborative Operating Group ID) which is assigned from IPAWS and tied to posting authorizations.
Below are the IPAWS outputs: WEA (Wireless Emergency Alert), EAS (Emergency Alert System, and NWEM (Non-Weather Emergency Message).
If WEA is selected, an additional four text fields will open in the second (middle) panel, and two of the four text fields must be filled out.
- WEA Short: SMS – is based on cellphone carriers. WEA Short SMS is mandatory to complete. All other WEA fields are optional but encouraged.
- WEA Long: SMS – based on cellphone carriers.
- Additional Options: WEA Spanish short and long options.
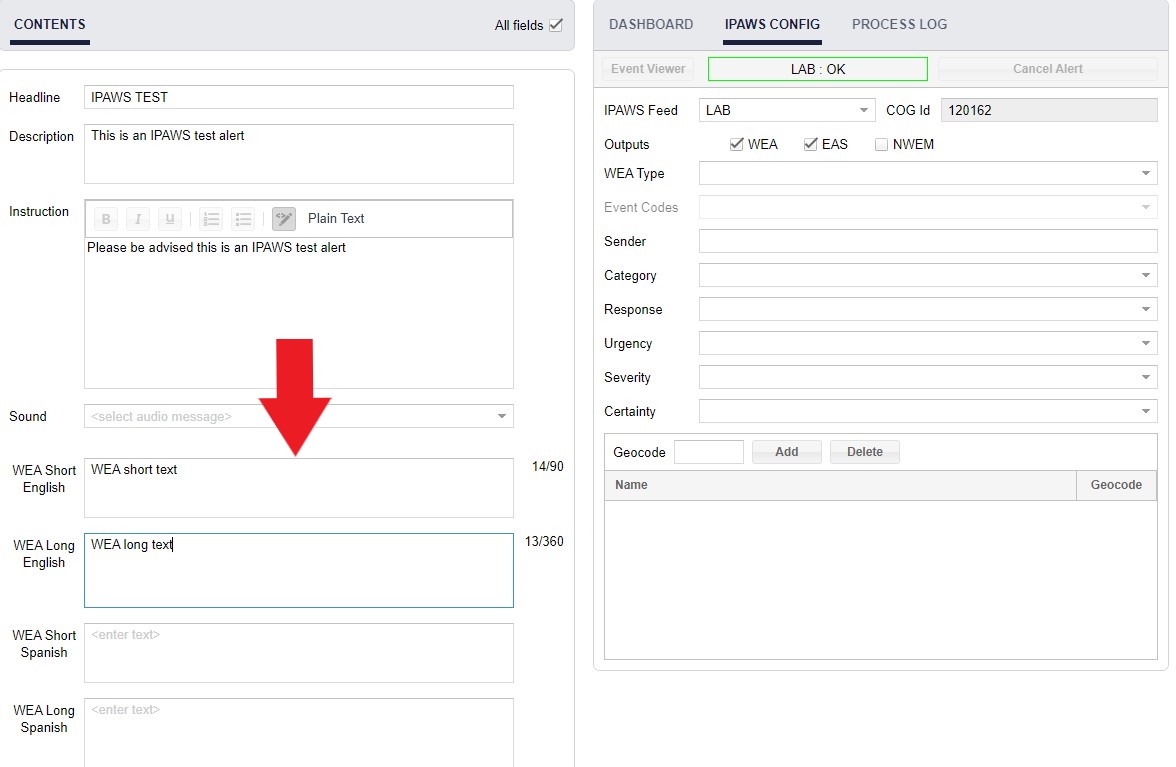

Fig.1 Mandatory WEA Short Fig. 2 WEA Short complete
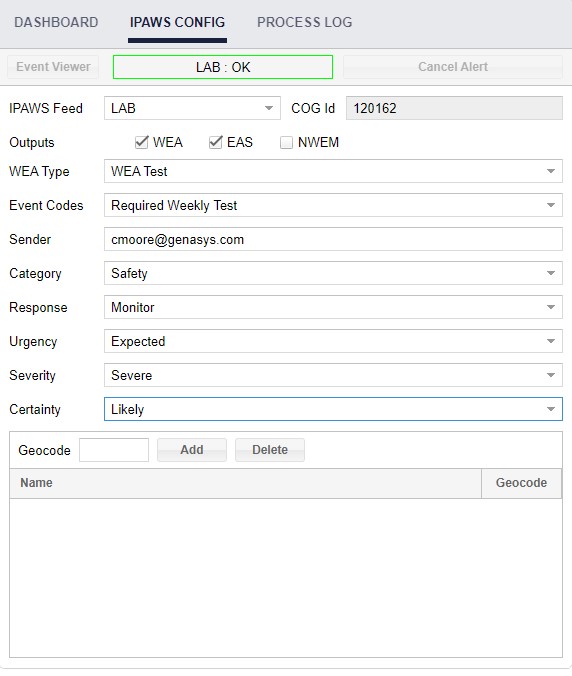
Next you need to fill out the Configuration fields below.
- WEA Type – The type of IPAWS warning
- Event Code – Is a specific IPAWS code associated with event – the dropdown list options will be based off the type of alert.
- Sender – Who sent the alert – this can be an individual email or an assigned group/business email.
- Category – Is the type of emergency at hand.
- Response Type – How emergency services are expected to respond.
- Urgency – How fast emergency services should respond and whether the occurrence was expected.
- Severity – the classified severity of the event or the degree of danger from the emergency ranging from Minor to Extreme
- Certainty – The degree to which it is known whether the emergency is taking place.
Next you need to fill in the Geocode or FIPS code associated with the IPAWS posting authorization.
This code can be typed in or can be generated using the Map. This can be done by drawing a shape using the geo-fencing tools on the Map, saving it, and the authorized Geocode/FIPS code options will be shown below.
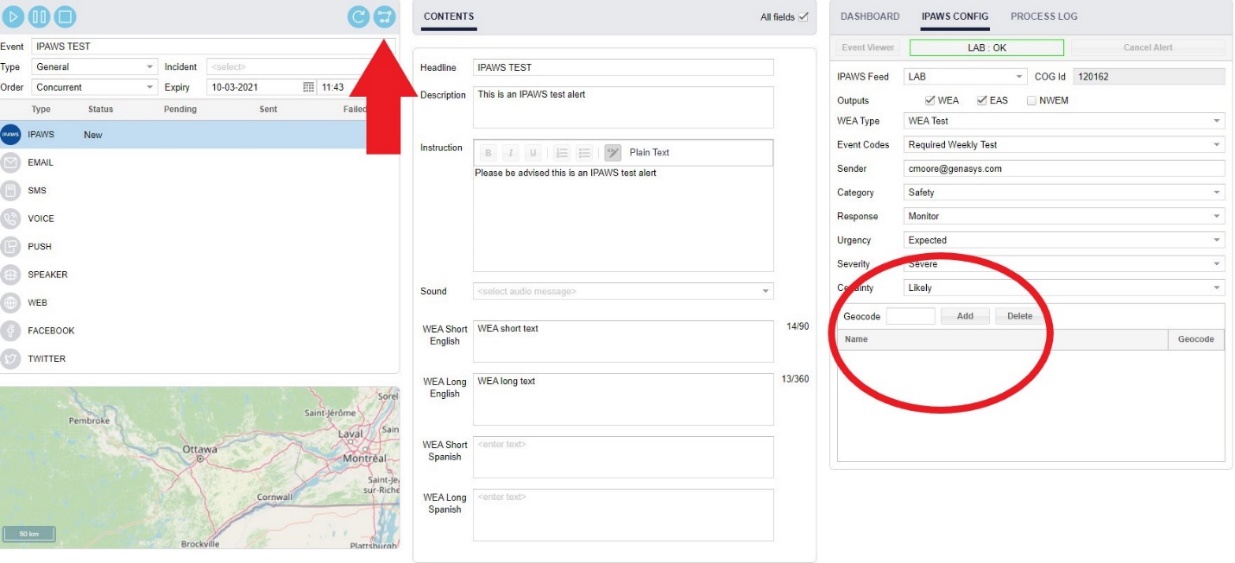
After everything has been set the IPAWS alert is ready and can be issued by pressing on the Play button.
