How to Create and Assign Groups – V1
After logging in, select the ‘Contacts’ section on the Toggle Menu.
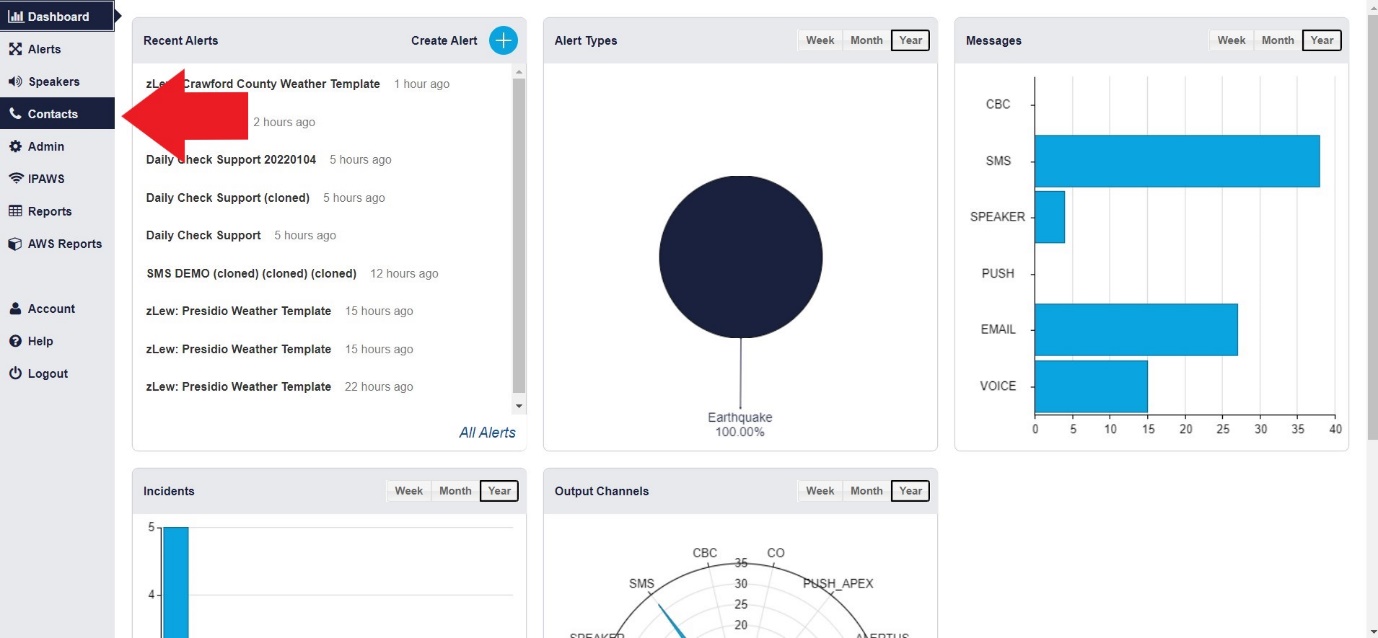
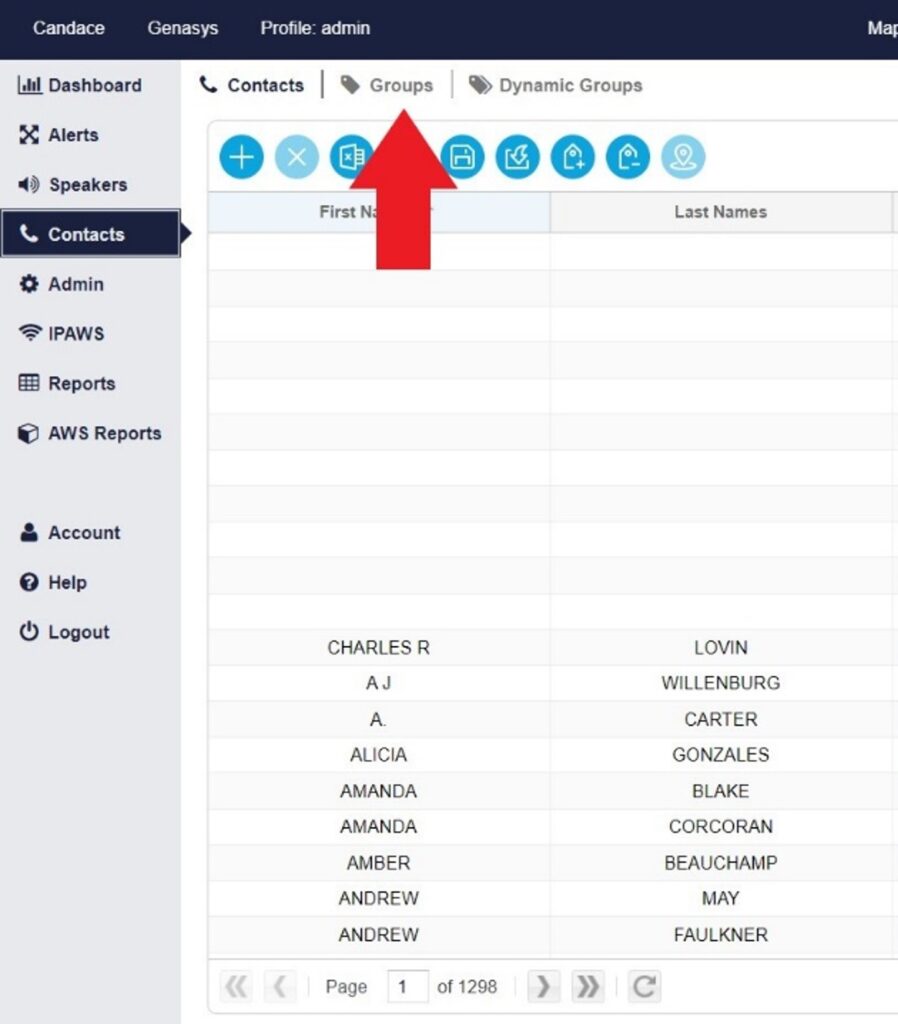
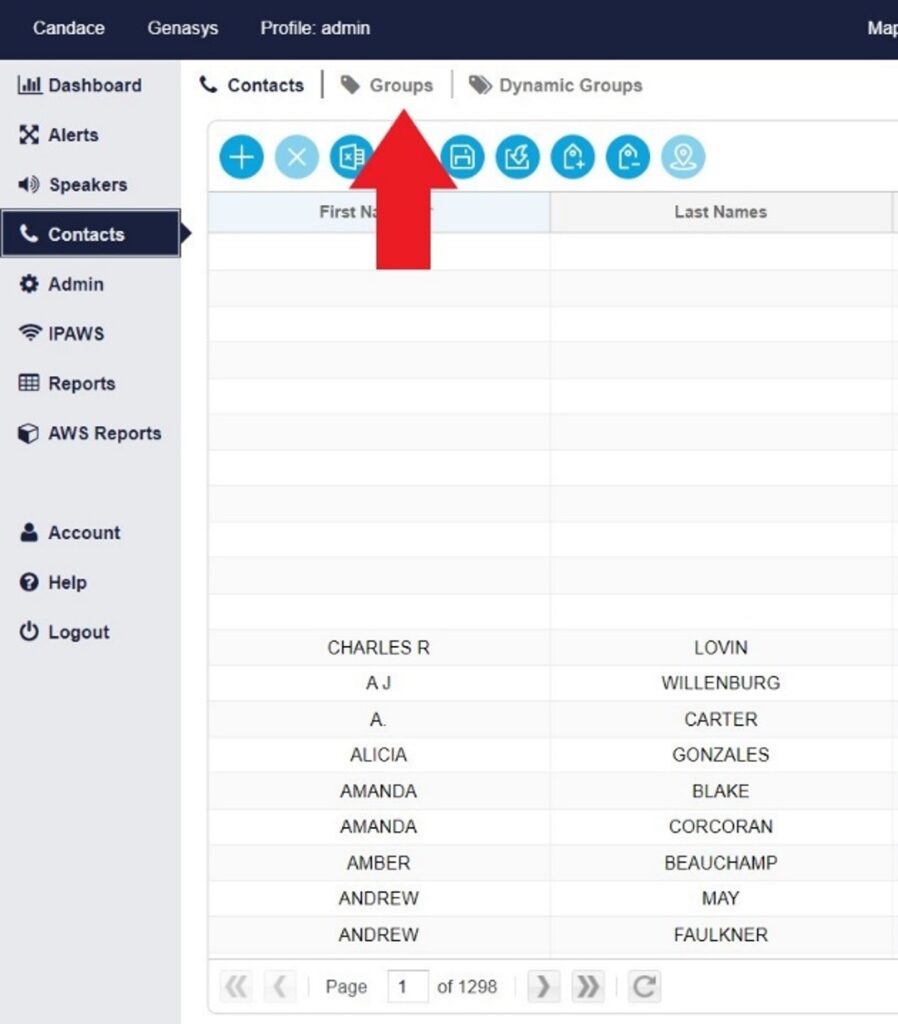
Step 1) Once in the ‘Contacts’ section, you will need to select the ‘Groups’ sub-section at the top. This sub-section is intended for users to create, edit, and delete groups.
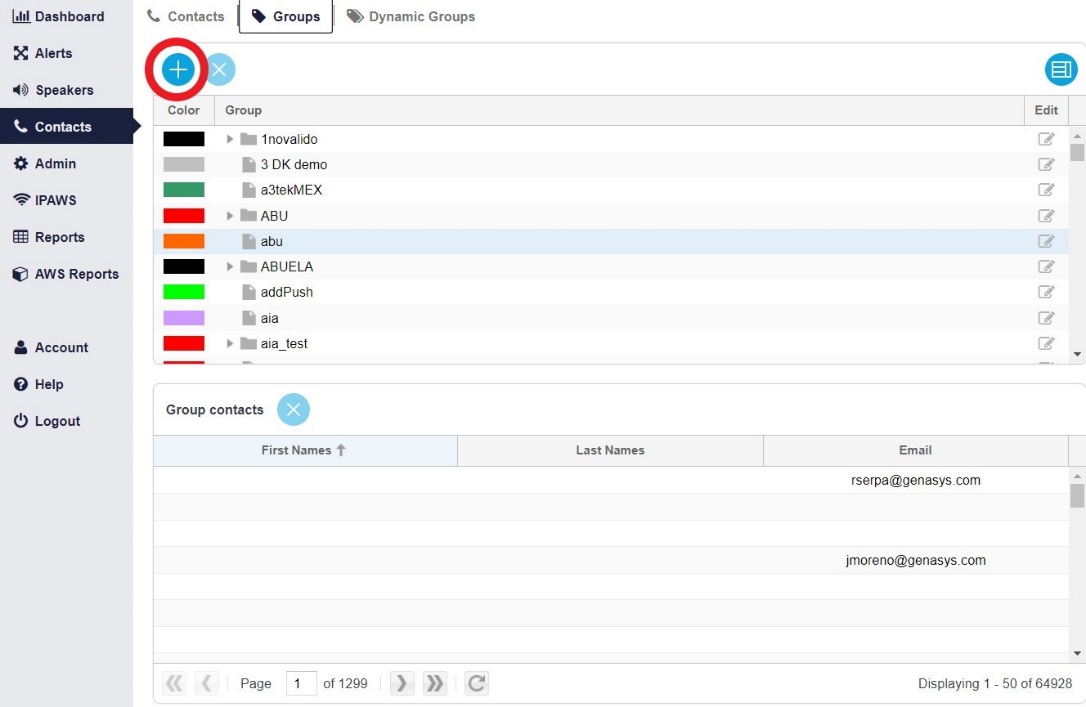
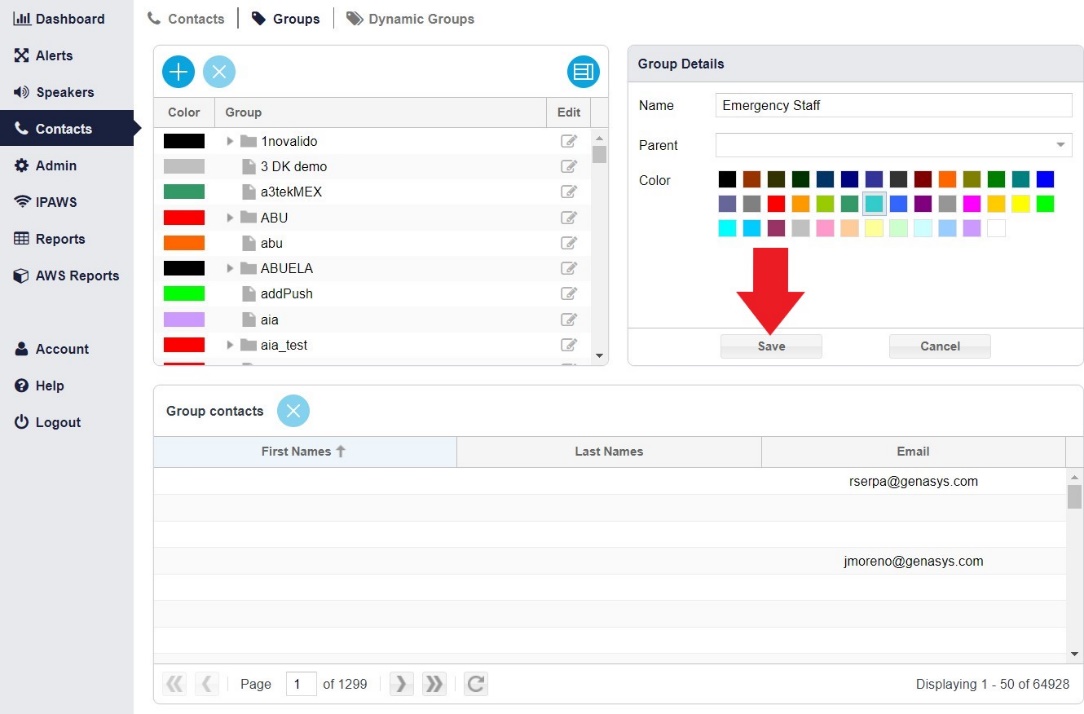
Step 2) To create a new Group – you will need to click-on the positive button.
Step 3) A new panel for ‘Group Details’ will open on the right side of the screen. You will need to name the new Group and select a color to associate with the grouping. In addition, there can be a Parent Group associated with the new Group.
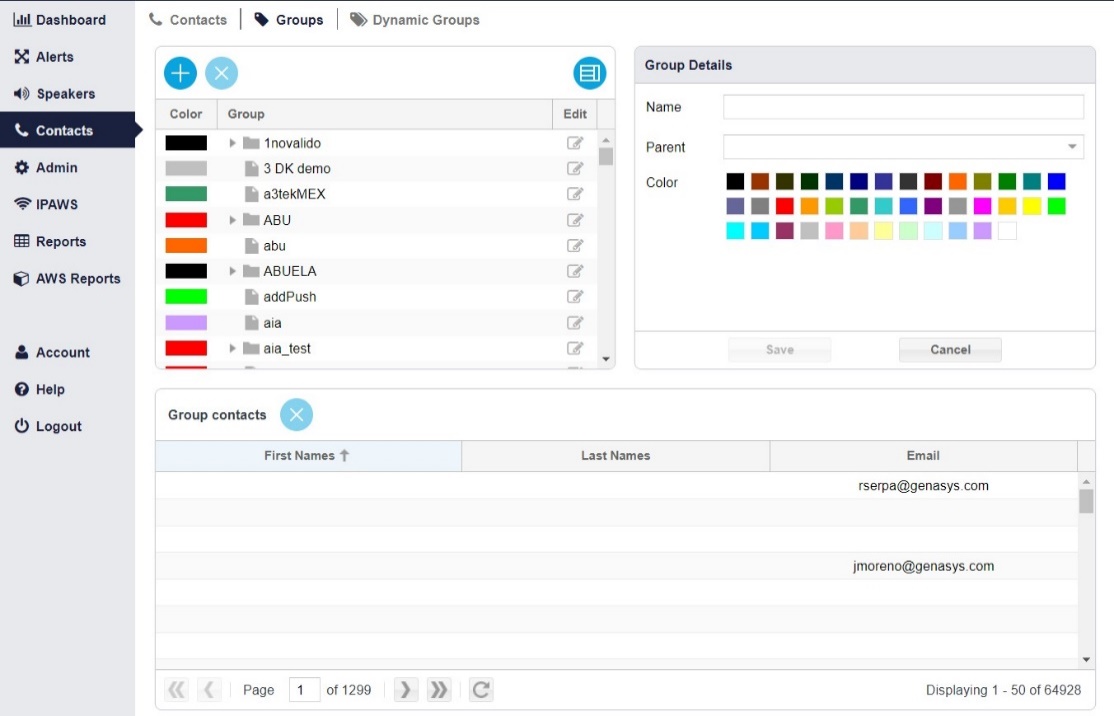
Step 4) Then click Save – and the Group that was created has now been saved into the system.
Assigning Groups
There are two ways to add a Group to a contact profile. Firstly, you will need to head back to the ‘Contacts’ subsection.
Option 1) Then you can select the ‘Add groups to contacts’ button, which will add a Group to all contacts listed in the system. Generally, this button is used for internal groups, mass notification, or emergencies.
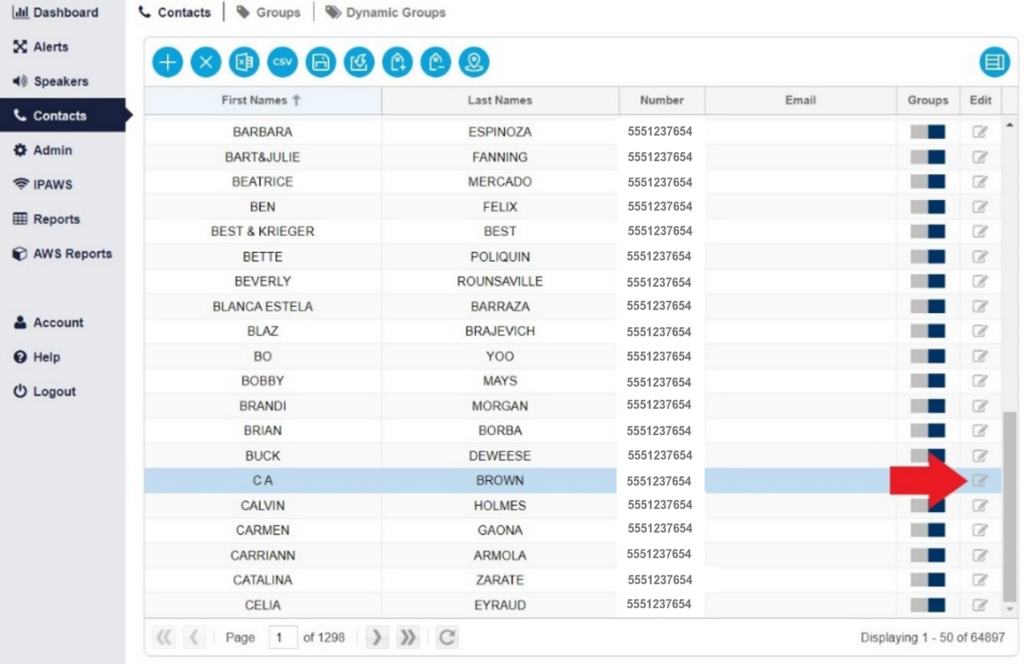
Option 2) The second way to add a Group is to manually input it into an individual’s contact profile. This can be done by either double clicking on the profile or selecting the edit button and then adding a Group to the contact’s details.
In the General tab of the contact record, select from the drop-down list of groups at the bottom of the tab. One or multiple groups can be added or removed from this section.
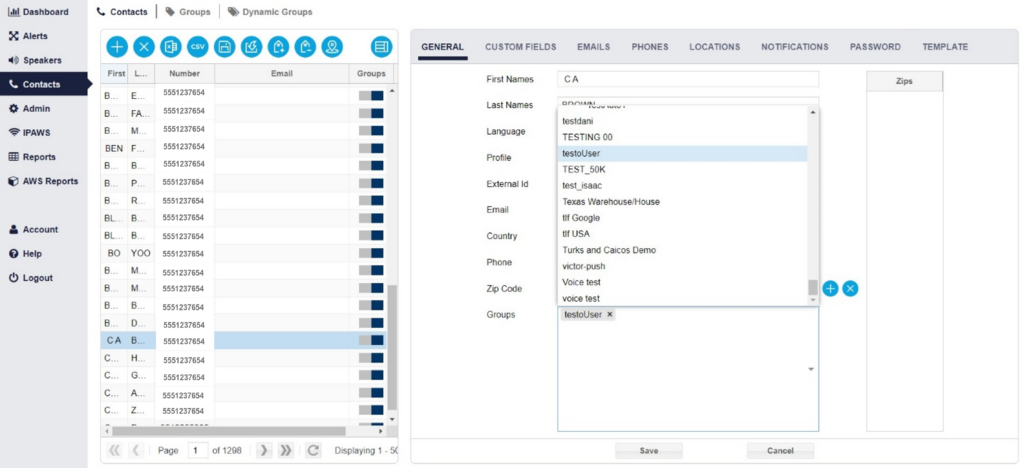
Once you are finished adding/removing groups, select the “Save” button to save the changes.
Dynamic Groups
GEM can also create groups automatically by creating conditions that a contact needs to meet in order to form part of a group. For example, dynamic grouping allows you to group people who have the same ZIP code and or phone number prefix. Custom Fields also assist in the creation of Dynamic Groups. The combinations are endless.
To create a new Dynamic Group, navigate to the Contacts section and select the “Dynamic Groups” tab.

Provide a name for the group and select the condition of “And” or “Or”. And means that all criteria must be met in order for the contact to be added to the group. Or means that any criteria can be met to be included in the group.

Next, select “Add Condition”. The condition will be the criteria that will need to be met. A Property, Operator, and Value will need to be completed for each criteria. The example below is looking for an email domain containing “@genasys.com”. Any contacts with that email domain will be included.

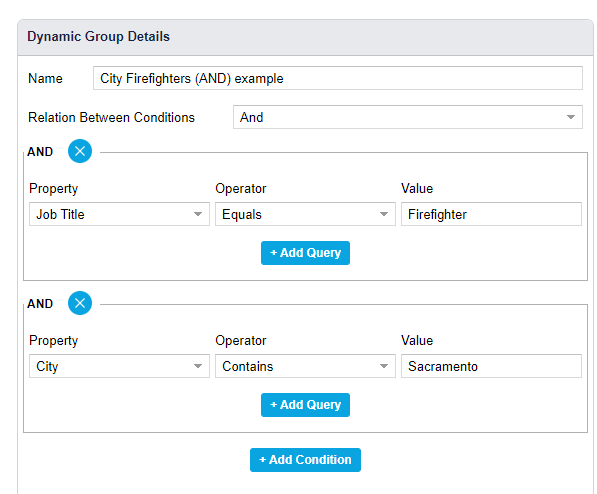 See below example of “And” operator.
Multiple conditions can be included to further filter down the criteria. See example below for “OR” operator.

Once you have completed selecting the criteria, select “Save”. Contacts will now automatically be added/removed from the Dynamic Group as the system will determine if the contact meets those criteria or not.
