ALERT Admin App – Mobile
QUICK REFERENCE GUIDE
The GEM Admin Mobile App is an available tool that allows credentialed users to send alerts quickly and seamlessly when seconds count. This tool is available for both iOS and Android devices for users on the go that do not have access to a laptop or desktop.
The greatest benefit of the GEM Admin Mobile App is to utilize your pre-created Quick Launch alerts that can be sent within seconds. If placeholders are included in the Quick Launch, easily fill in the details and send the alert.
It should be noted that the screenshots used in this guide were taken from an iOS device and Android devices may have a slightly different appearance. However, functionality remains the same on all mobile devices.
This guide will explain the steps from downloading the GEM Admin Mobile App to building and sending alerts and utilizing configured speakers. However, the app does not have the full functionality of the GUI (Graphic User Interface) as it is designed for fast alerting on the go.
Accessing the App
Visit your respective app store and download the GEM Admin app. The app will have a blue logo with a speaker as shown below.
GEM ADMIN APP
Scan the QR codes above to access and download the app as well.
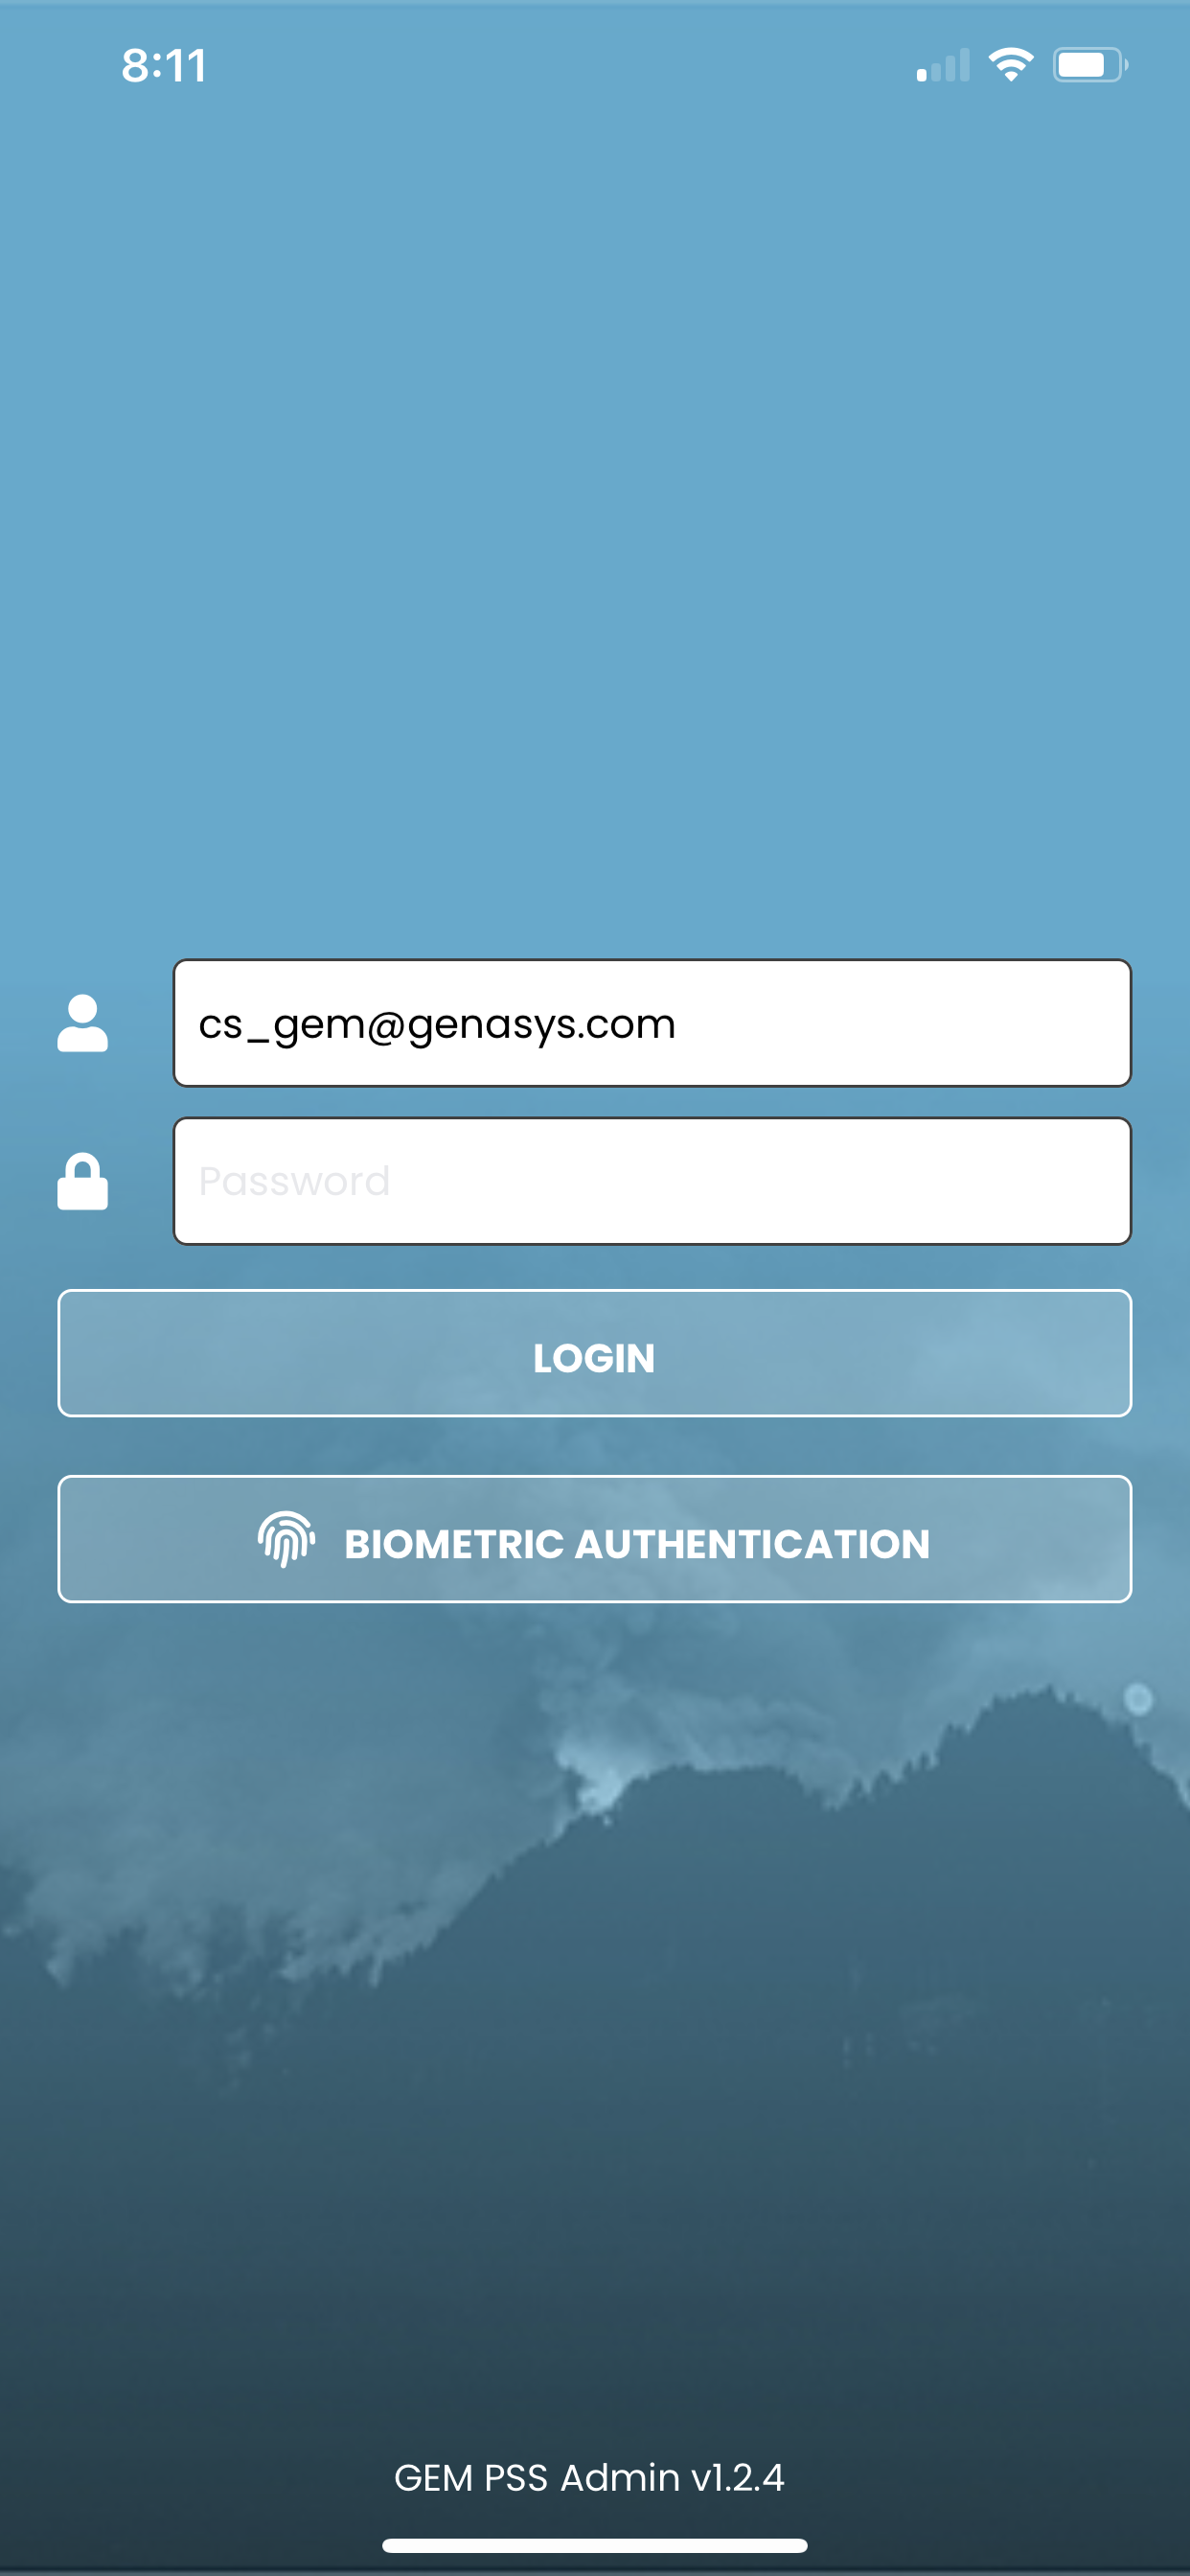
To log into the GEM Admin App, enter your Admin credentials as seen in the figure below. Use the same issued credentials that you log into the GUI with. Users without active credentials will not be able to log into the app.
adminemail@genasys.com
For iOS devices, Biometric Authentication using Face Detect can also be used to log into the app. For Android, fingerprint identification is used. Making this an even faster way to log in and send alerts.
![]() Upon logging in, select the ( )icon to navigate within the app.
Upon logging in, select the ( )icon to navigate within the app.
Select the Alerts option to send saved Quick Launch alerts, and build/send new alerts.
Select the Speakers option to Manage and Deploy Sound to your LRAD integrated speakers.
Select the Sounds option to record sounds for your LRAD speakers.
Select your preferred Language from the drop-down menu. This option will change the language of the interface to your preferred language. However, changing the interface language does not translate messages within Quick Launch or Alerts.
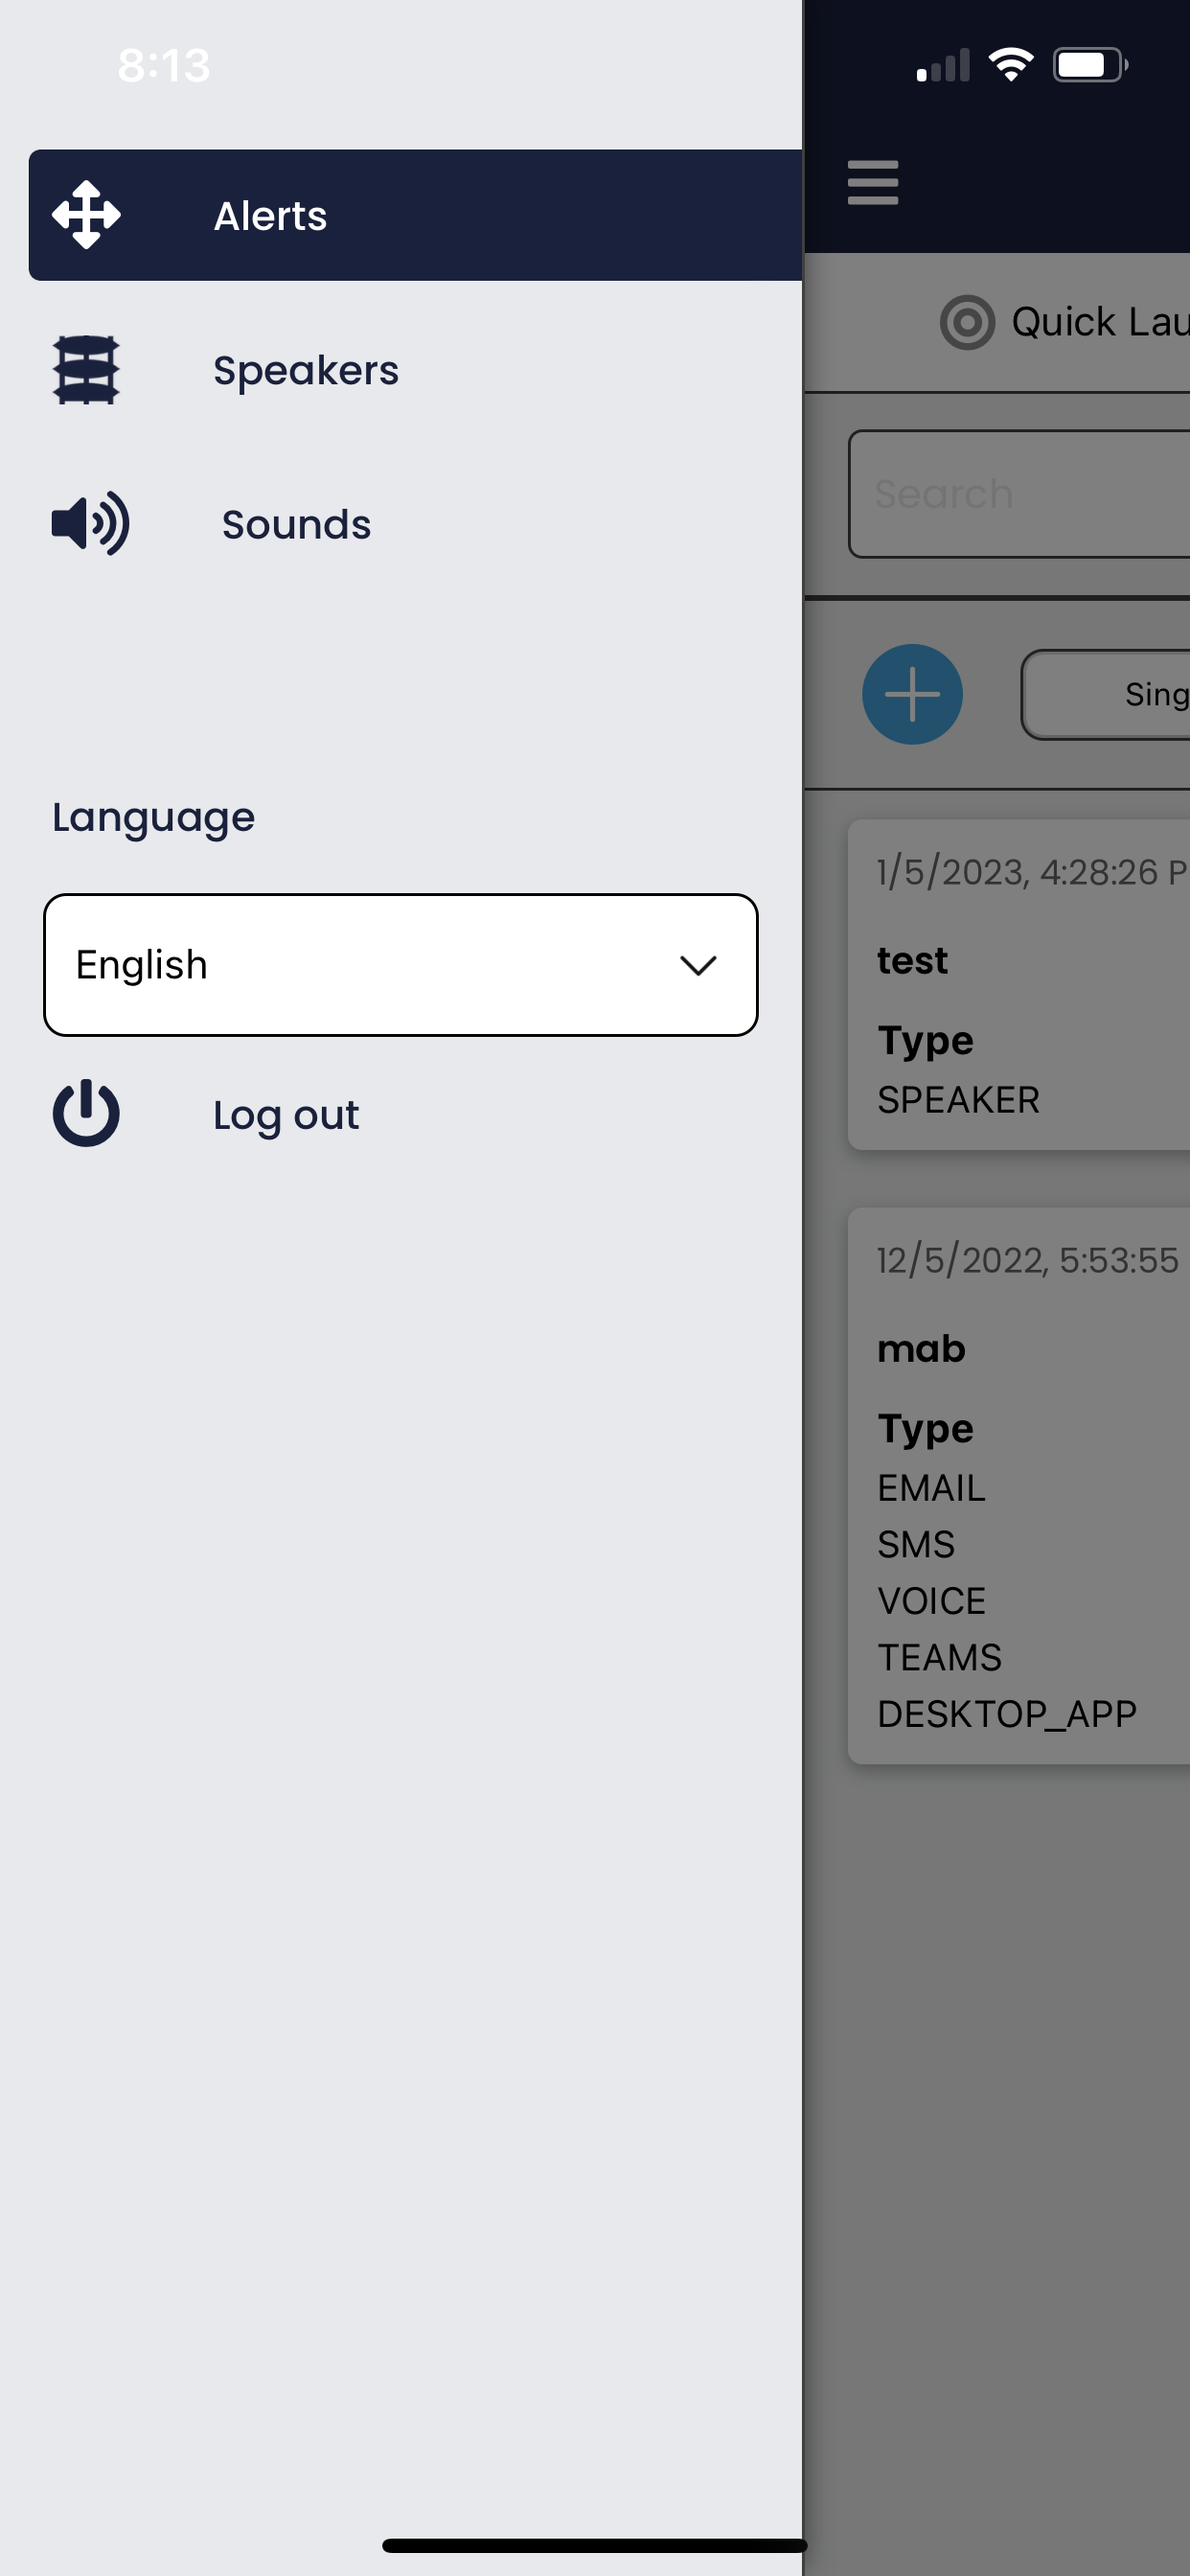
1. Alerts Menu- Send Quick Launch and build new alerts
2. Speakers- Manage and Deploy Sound for your LRAD speakers.
3. Sounds- Record and save message for use with LRAD speakers.
4. Language- Change the interface to your preferred language.
Send a Quick Launch
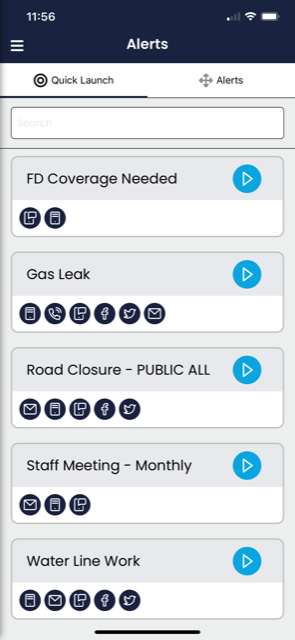
When you first log into the GEM Admin app, you are taken to the Quick Launch page.
The Quick Launch is a beneficial tool that allows you to send your more commonly used or recurring Templates with prefilled information and targets. Placeholders can also be included in Templates where you can fill in the specific details of that incident prior to launching the alert.
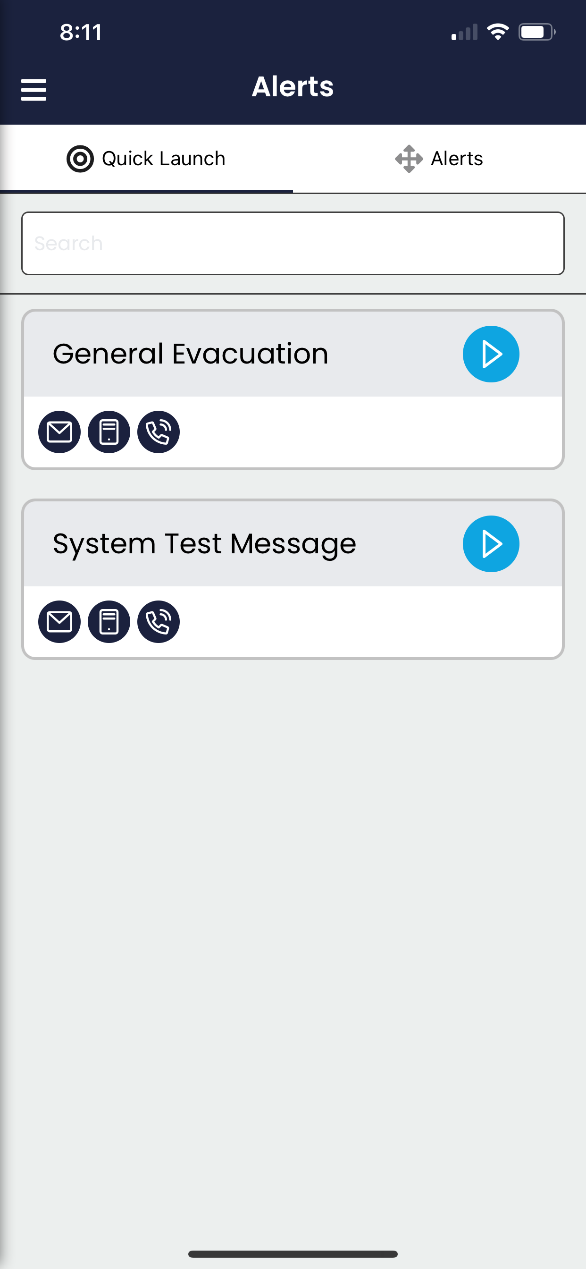
![]() To send a Quick Launch, select the ( ) button for the desired alert.
To send a Quick Launch, select the ( ) button for the desired alert.
Once you have selected the Play button, the Quick Launch will open a confirmation window. Any placeholders included will be in curly brackets and will need to be filled in prior to launch.
On the Confirmation window, you can verify the information is correct.
The Title and Long Text can be edited prior to launch. However, Channels, Placeholders, Polls, Geo-Targeted areas, and Individual Contacts must be edited within the template itself and not within the confirmation window.
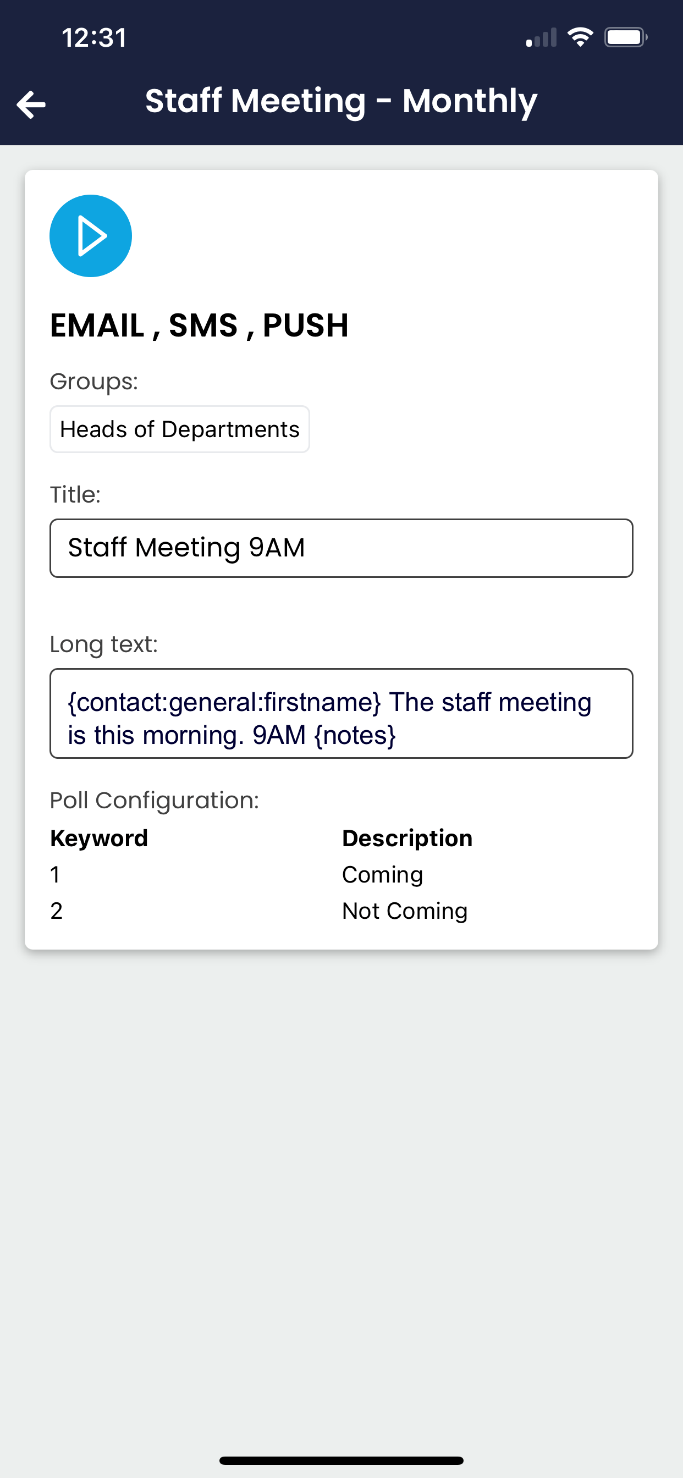
1. Quick Launch Name
2. Channels selected
3. Targeted Groups
4. Title – Used for the Email Header
5. Long Text – Message content, may or may not include placeholders.
6. Poll Configurations- These are reply options available for targets.
![]() Select the ( ) button again to preview the Quick Launch and complete any placeholders needed.
Select the ( ) button again to preview the Quick Launch and complete any placeholders needed.
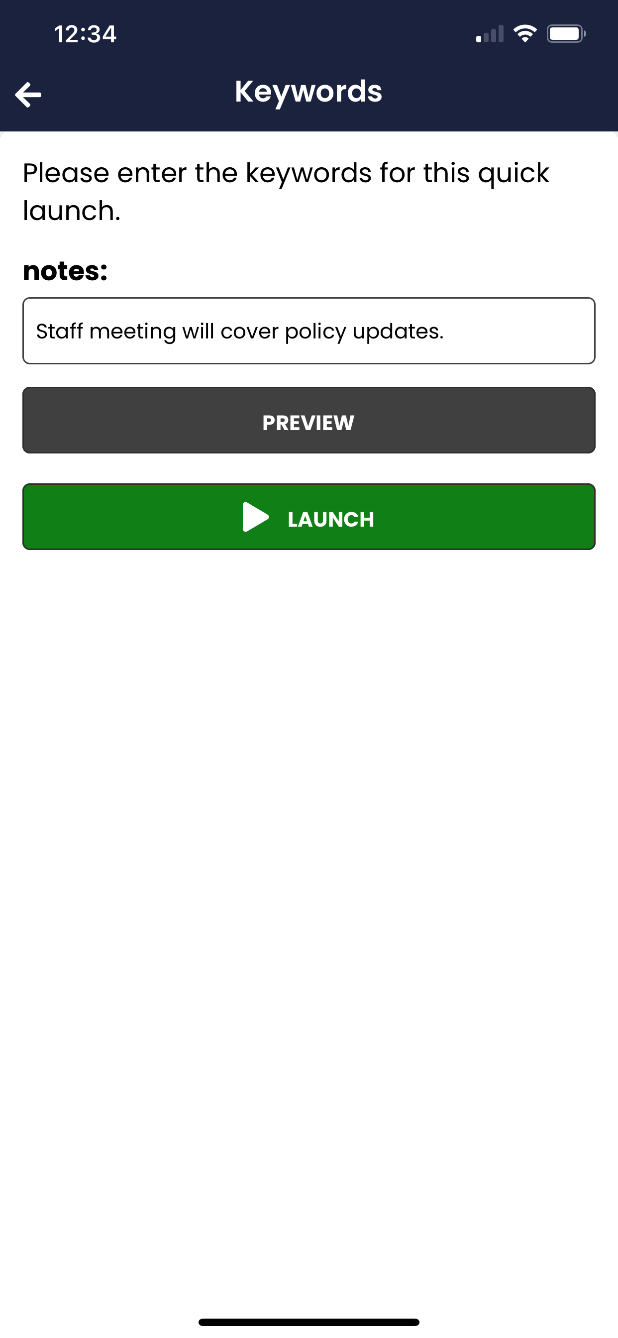
Selecting the Preview button will allow you to view the alert with placeholders filled in prior to sending. (Fig 1)
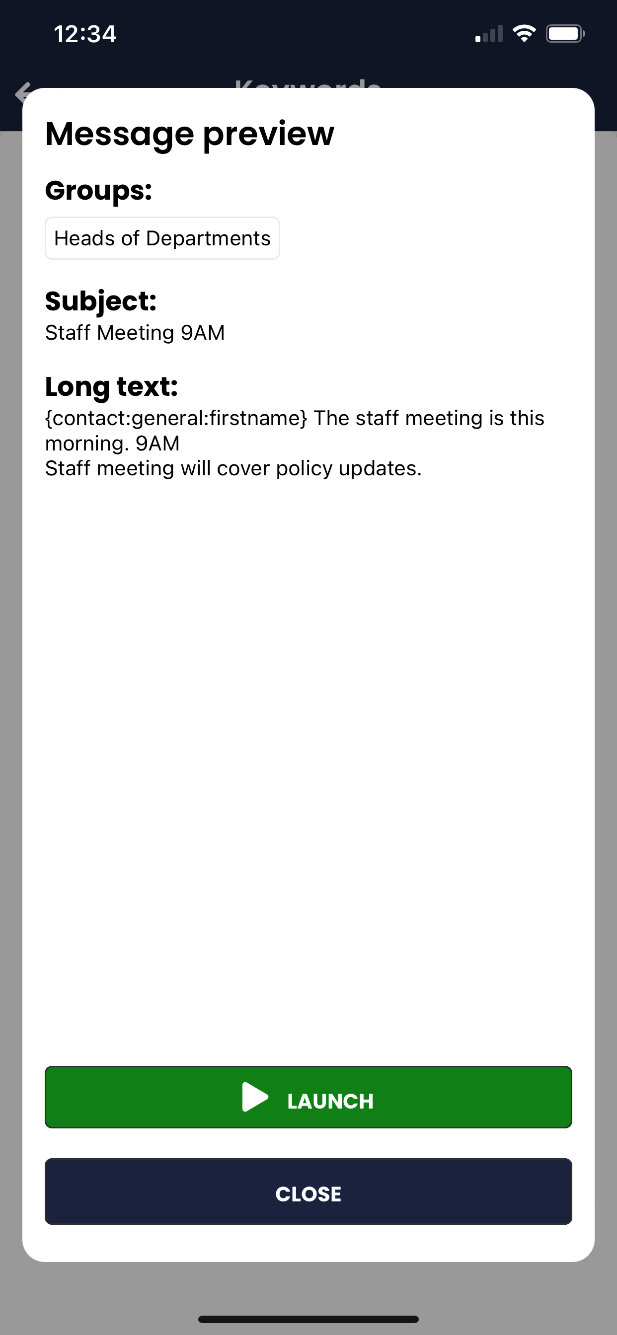
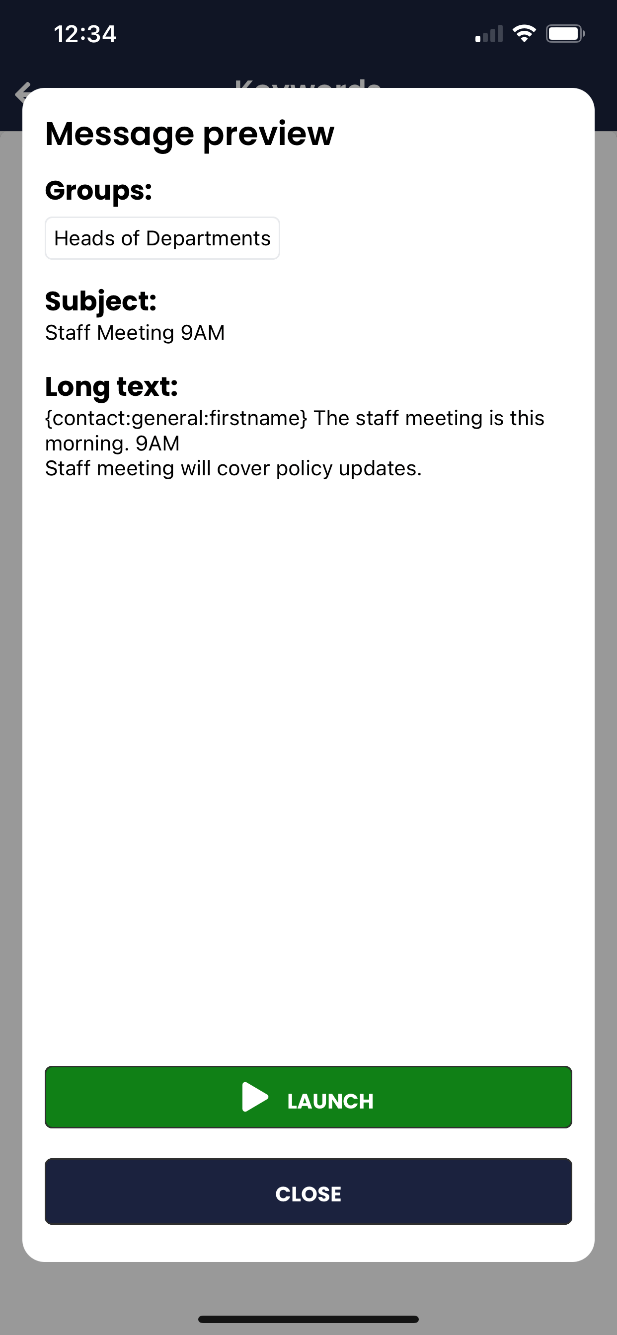
Figure 1 Figure 2
When you are ready to send the alert, select the Launch button as seen above. (Fig 2)
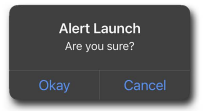
After selecting Launch, the Alert Launch window will appear with one final check to ensure you would like to send the alert. Click Okay to send the alert.
Alerts Tab
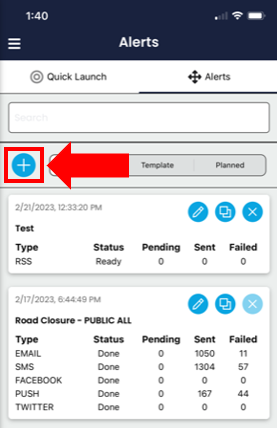
![]() On the Alerts Tab, view available Single Alerts, Templates and Planned Alerts that have been pre-created within the GUI and/or the Admin Mobile App. New alerts can be created using the ( ) button.
On the Alerts Tab, view available Single Alerts, Templates and Planned Alerts that have been pre-created within the GUI and/or the Admin Mobile App. New alerts can be created using the ( ) button.
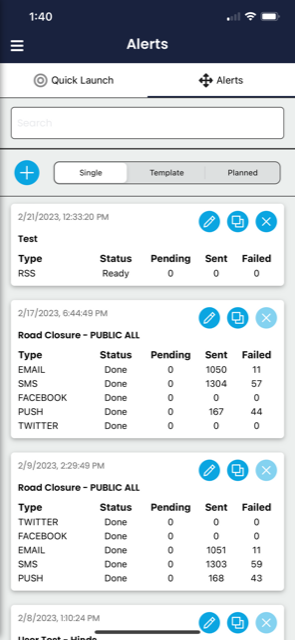
1. Create New Alert
2. Alert Type Menu
On the Single Alerts tab, New and Ready alerts will have options for Edit, Clone as Single or Template, and Delete. Single alerts that have been sent will not have the delete option. The Planned tab will also have the same options.

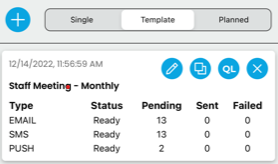
On the Template tab, view available templates that have been pre-created. This tab will provide options for Edit, Clone as Single or Template, save as Quick Launch, and Delete. It is recommended that Templates and Quick Launch alerts are created within the GUI.
Send a New Alert
![]() On the Alerts tab, select the ( ) button to create a new alert.
On the Alerts tab, select the ( ) button to create a new alert.
The Add a New Event window will open to begin the alert process. Complete the required fields and then select the Create Event button to proceed.
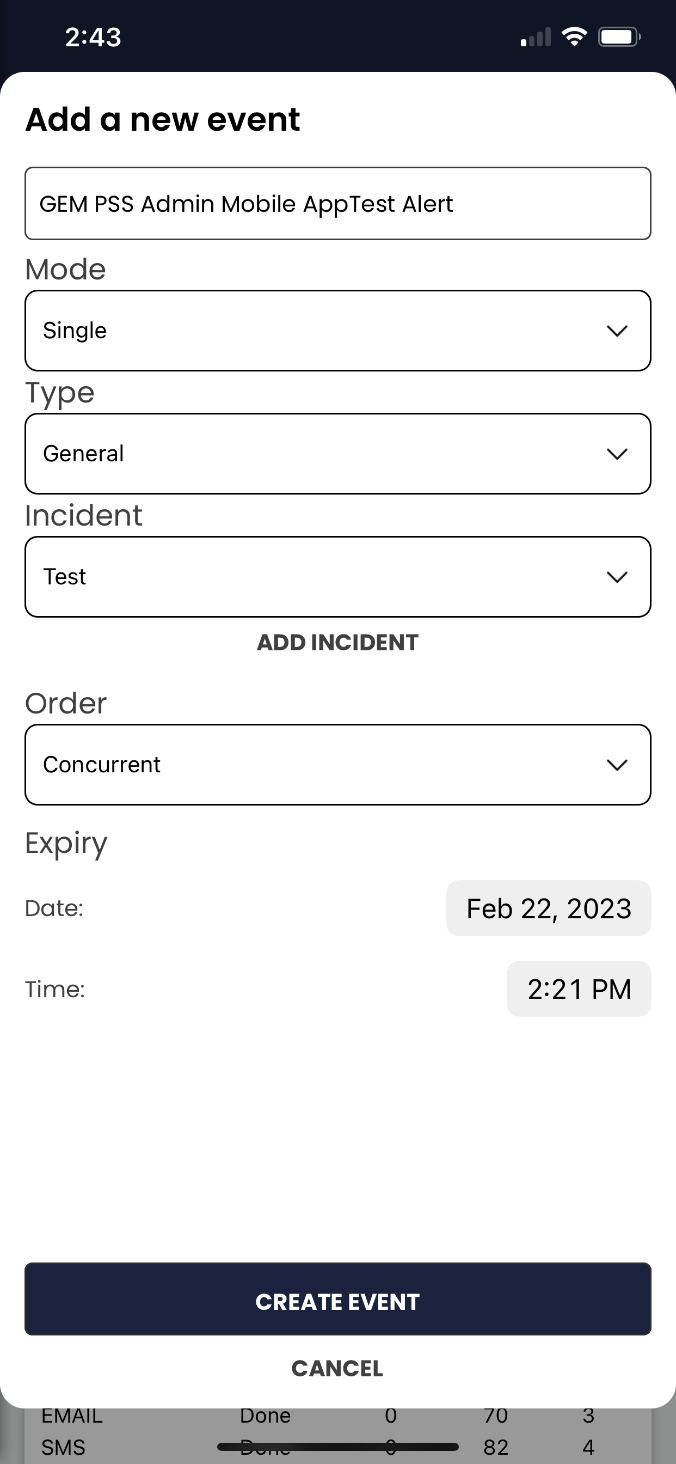
1. Event/Alert Name
2. Mode- Single, Template, Planned
3. Type- The type of alert you want to send.
4. Incident – Optional- The type of incident this is related to.
5. Order- Concurrent or Sequential until Success.
6. Create Event- Select this to proceed once 1-5 above are complete.
Once the Add a New Event page is complete, select the Create Event button to proceed.
![]() The next step in creating a new alert is selecting Channels. Select the ( ) button as shown below.
The next step in creating a new alert is selecting Channels. Select the ( ) button as shown below.
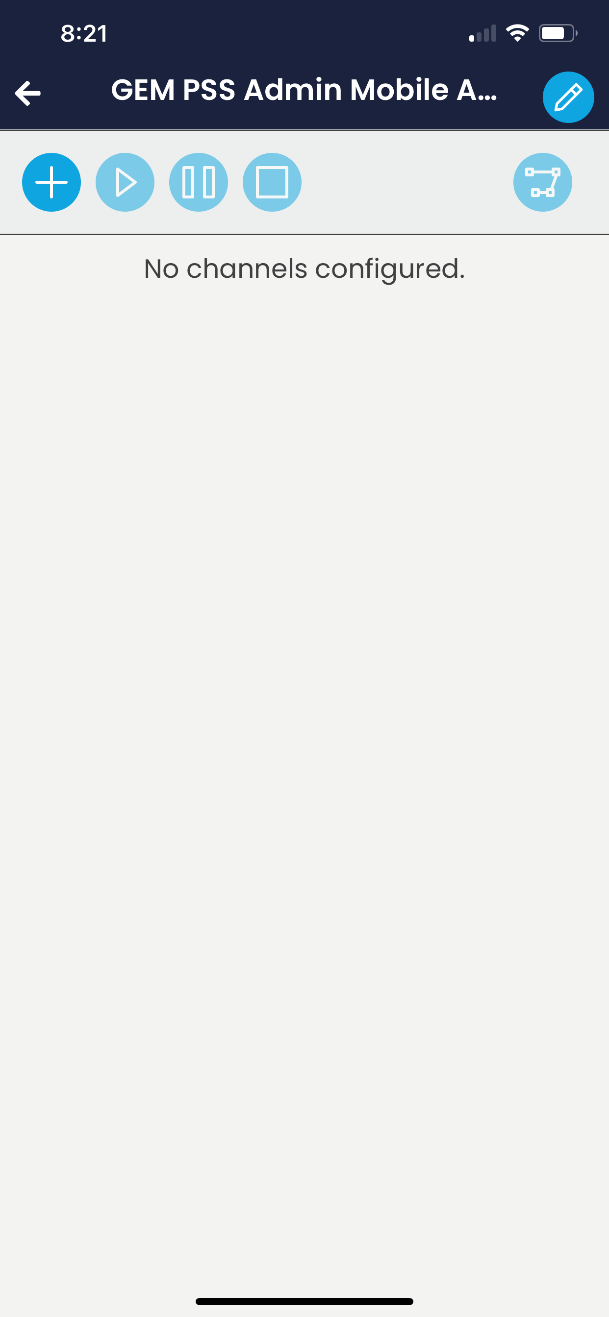
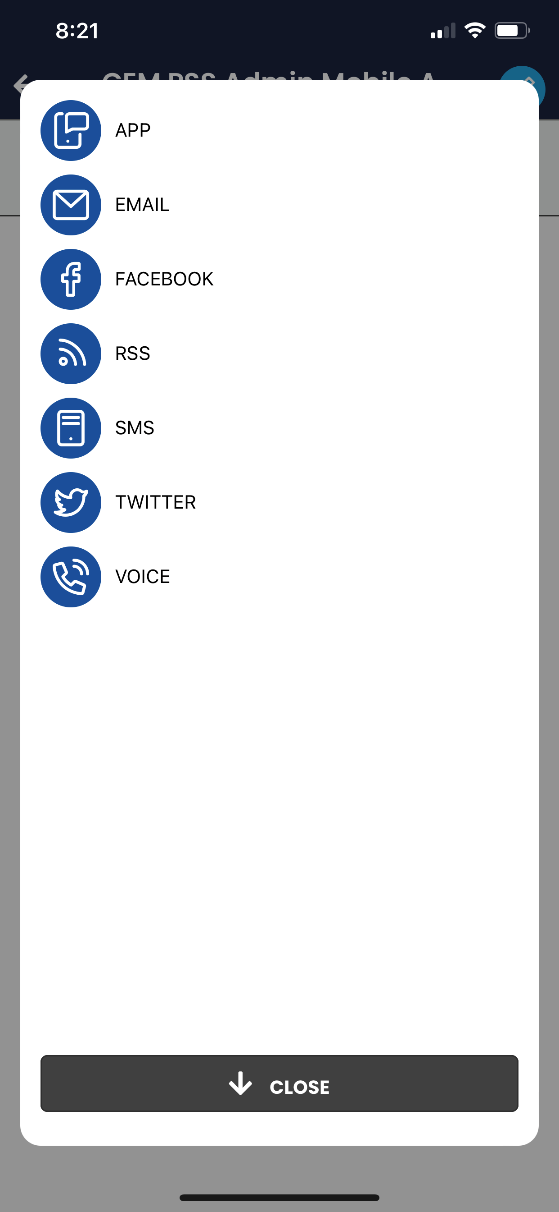 The list of available channels will open in a new window.
Select the desired Channel(s) by tapping the blue icons. Once the Channel(s) are selected, the blue icon will then display as grey.
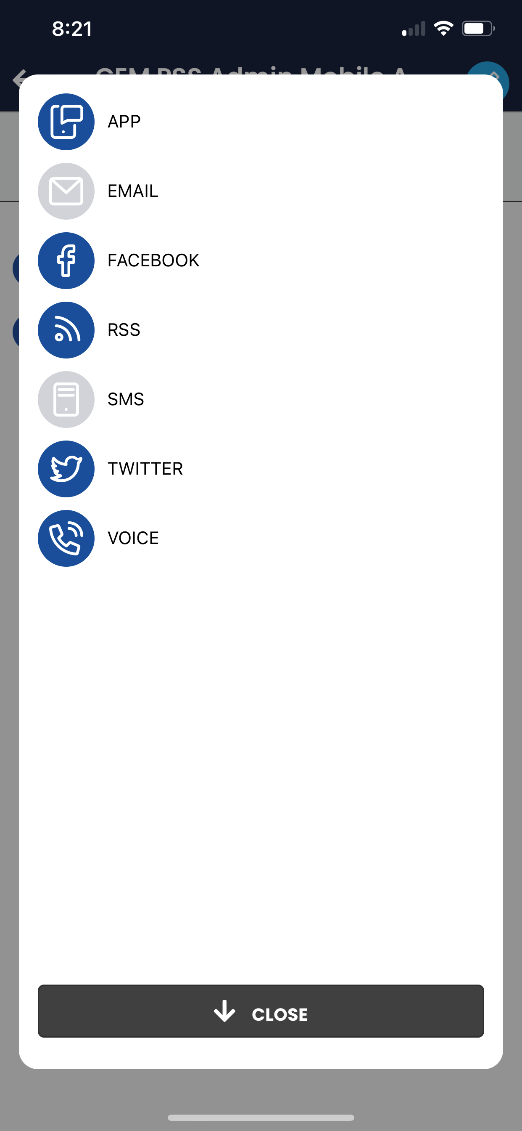
Next, select the Close button to proceed.
The Channel window will close, and you will now see your selections.
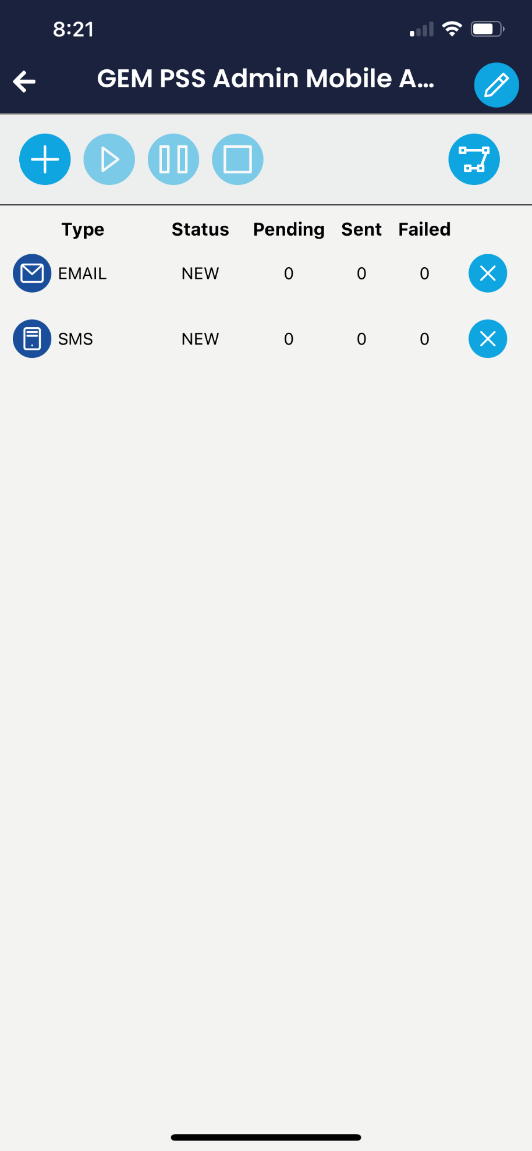
Tap on a Channel to create message content and select targets.
Once selected, there will be two tabs to complete including Content and Targets.
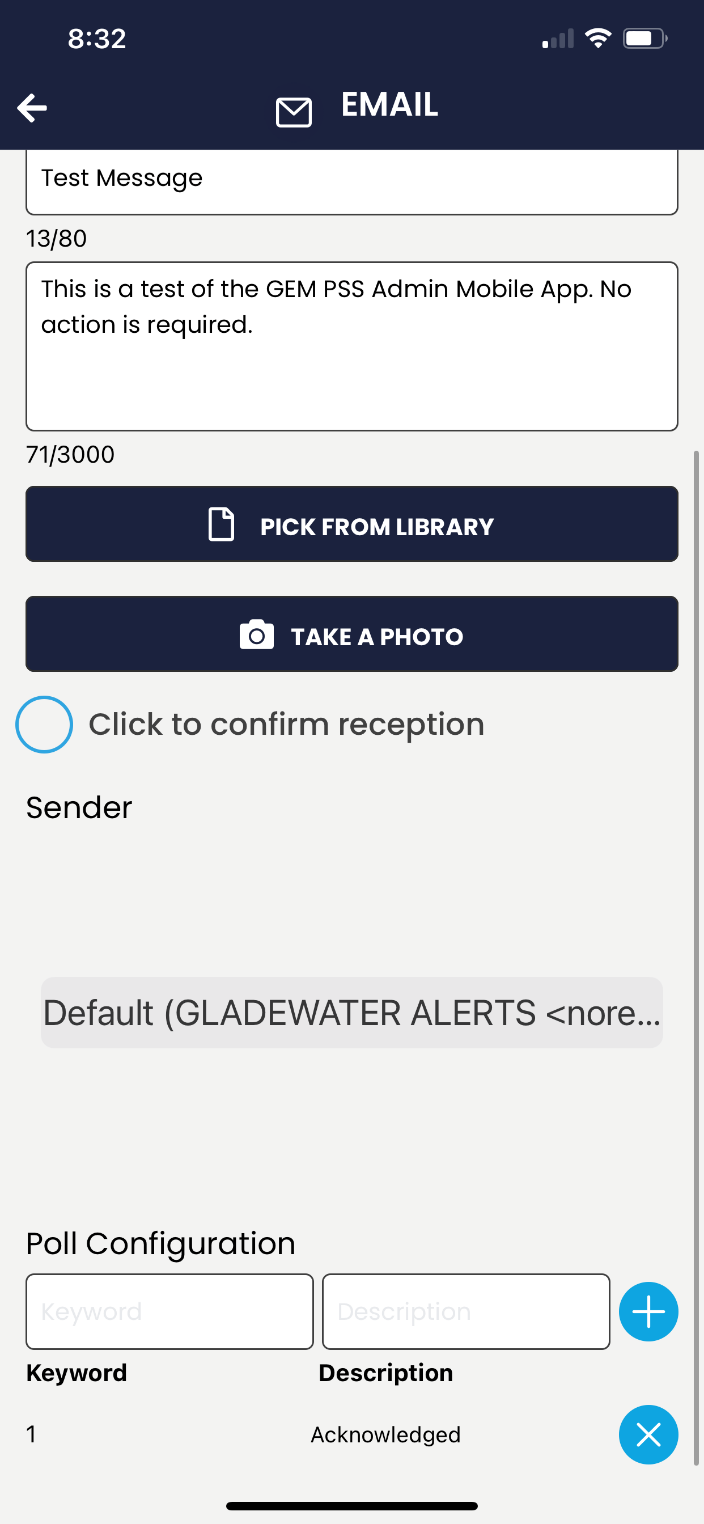
On the Contents tab, provide a title, which is also used for the email subject line, and message body.
Options for selecting existing photos or taking new photos, as well as receipt confirmation are available.
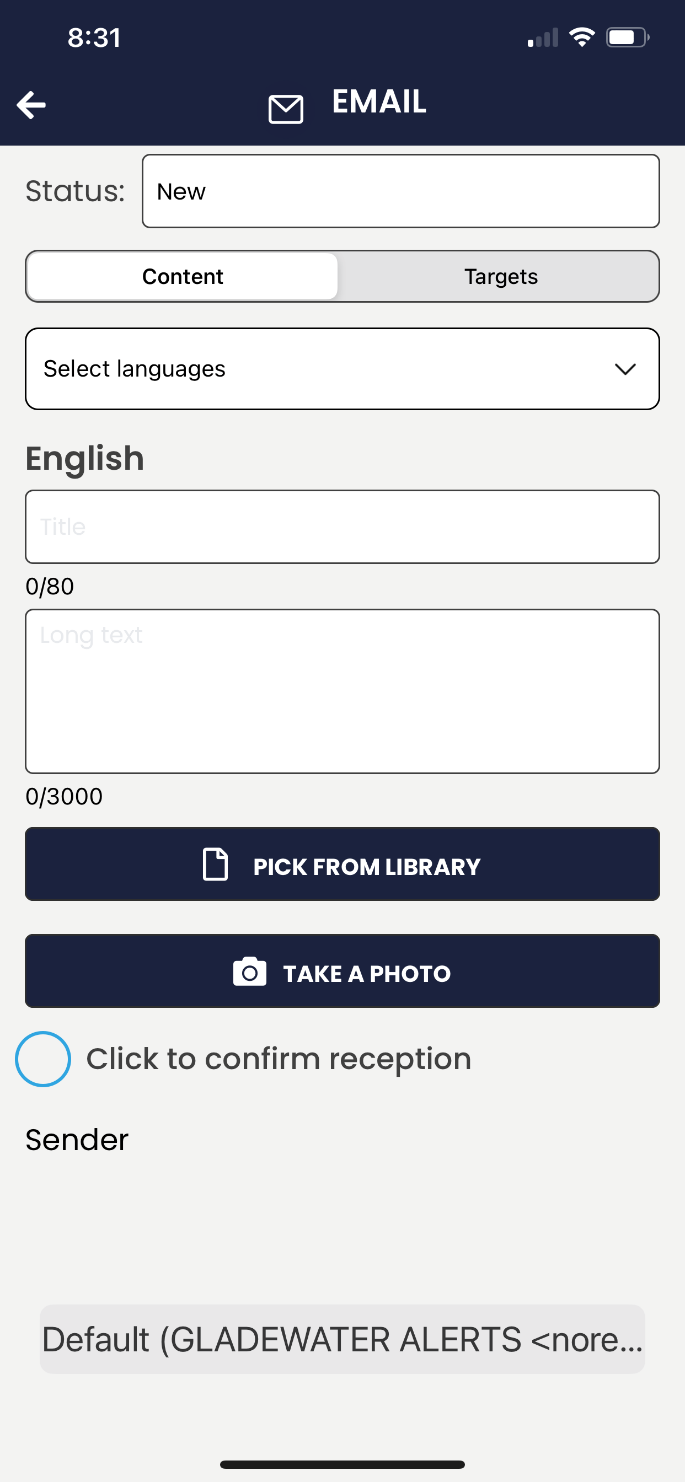
GEM App Test Message
This is a test message of the GEM Mobile App.
No action is required.
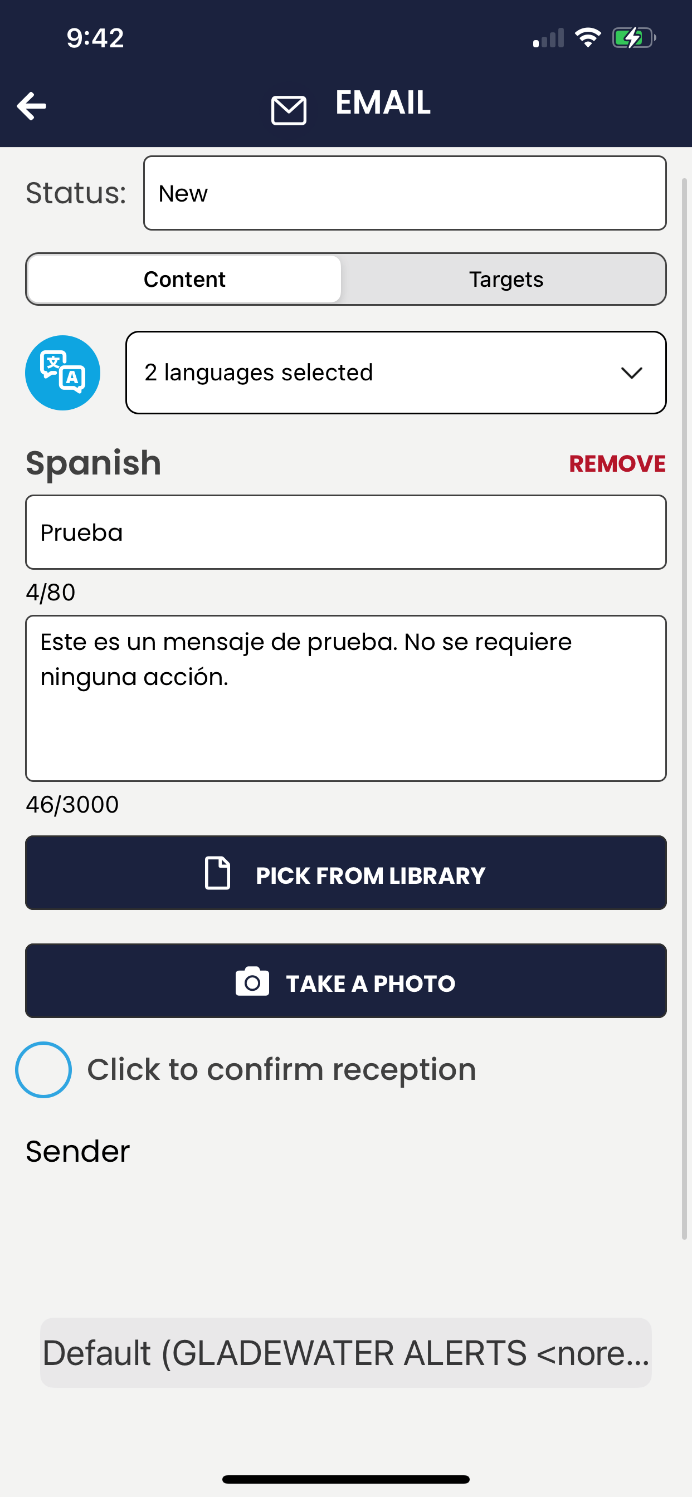
For additional Languages, use the drop down and make your selection from the available languages. Then tap the blue Translate button.
Your English message will automatically be translated in the desired language. However, you can also type the message out in that secondary language as well.
It should be noted that the translate feature does not translate poll options.
To add Reply options, scroll down on the Contents page to the Poll Configuration section.
![]() Enter a Keyword that the target will select as the response action for the desired Description. For example, the number 1 is the keyword that will be selected for the description of “Acknowledged”.
Enter a Keyword that the target will select as the response action for the desired Description. For example, the number 1 is the keyword that will be selected for the description of “Acknowledged”.
Once you have entered a Keyword and Description, select the ( ) to add. Multiple reply options can be included in your alert.
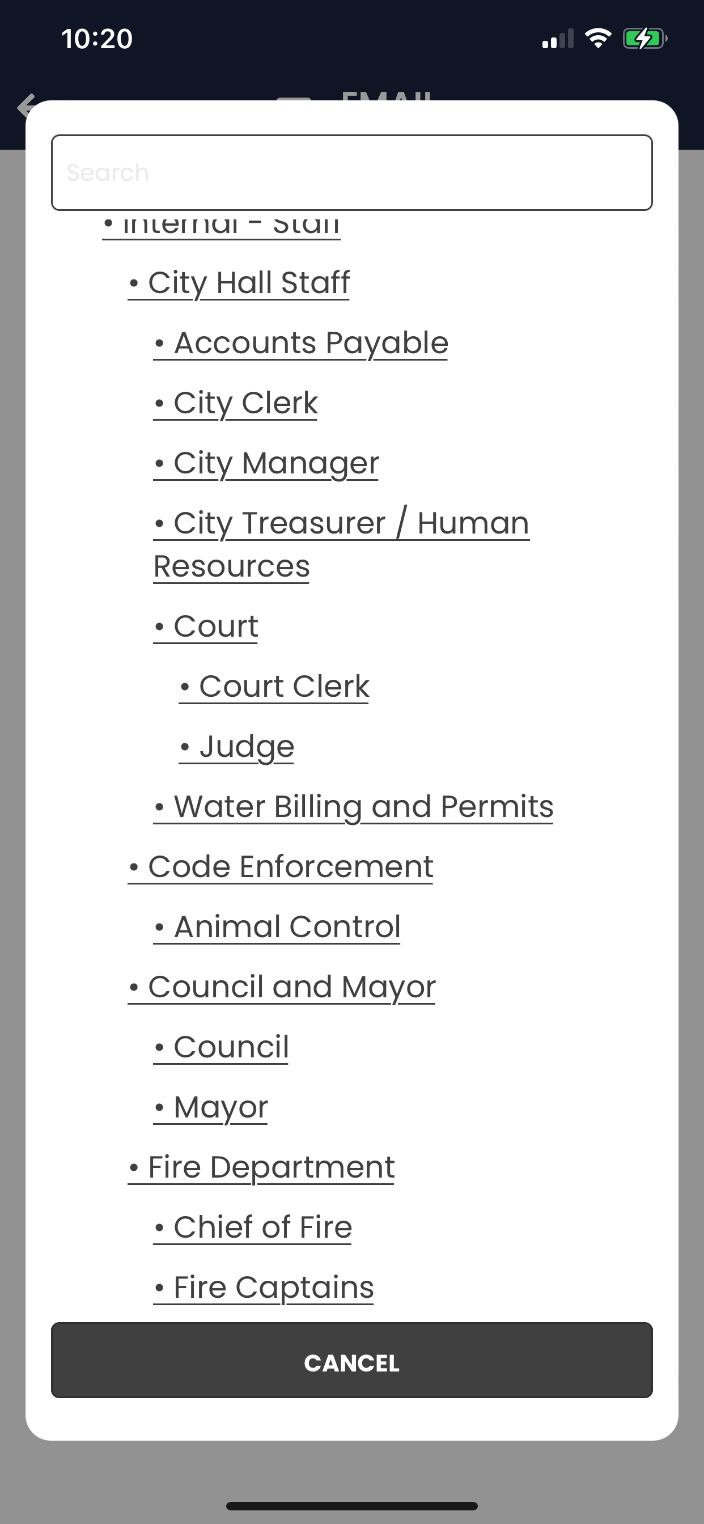
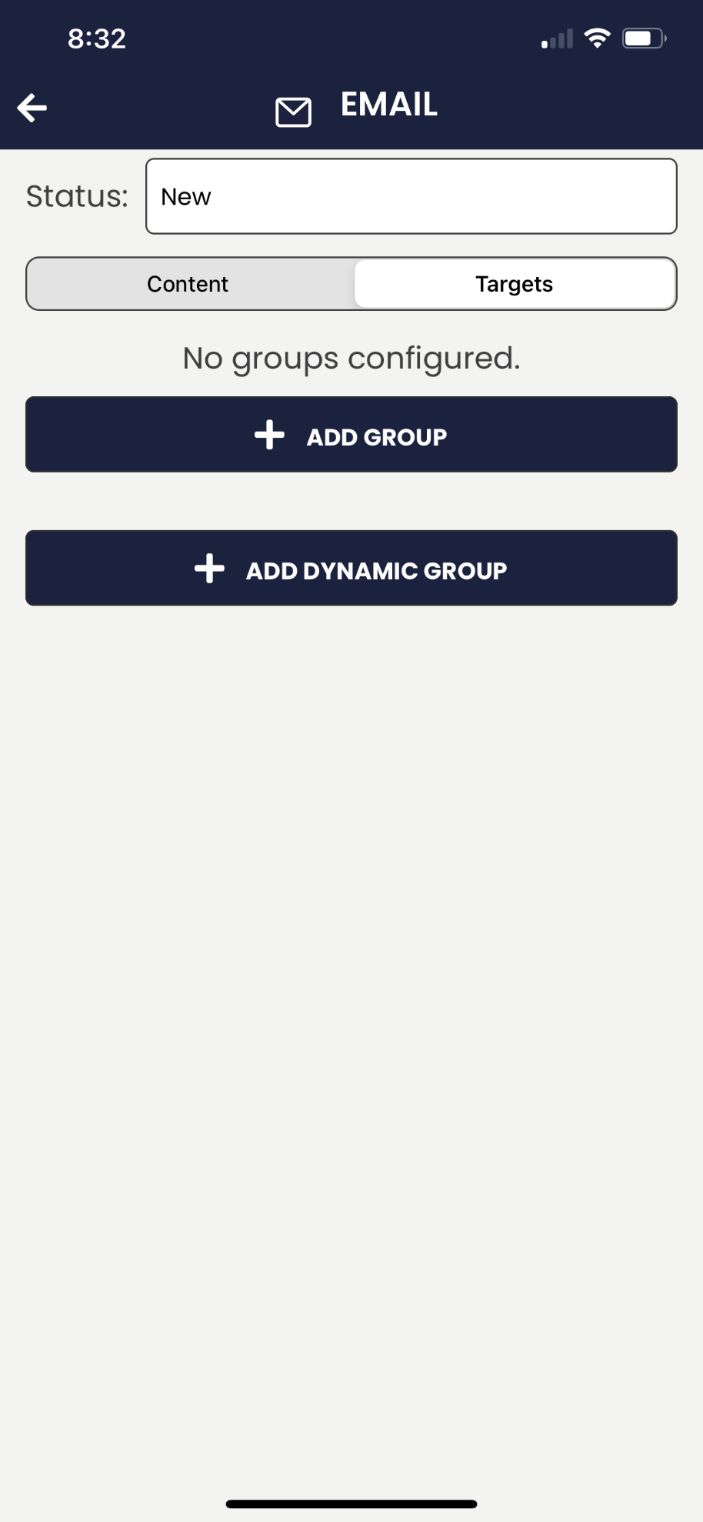
Once you have completed the message content, select the Targets tab. You can select from your available Groups and Dynamic Groups, or a combination of both.
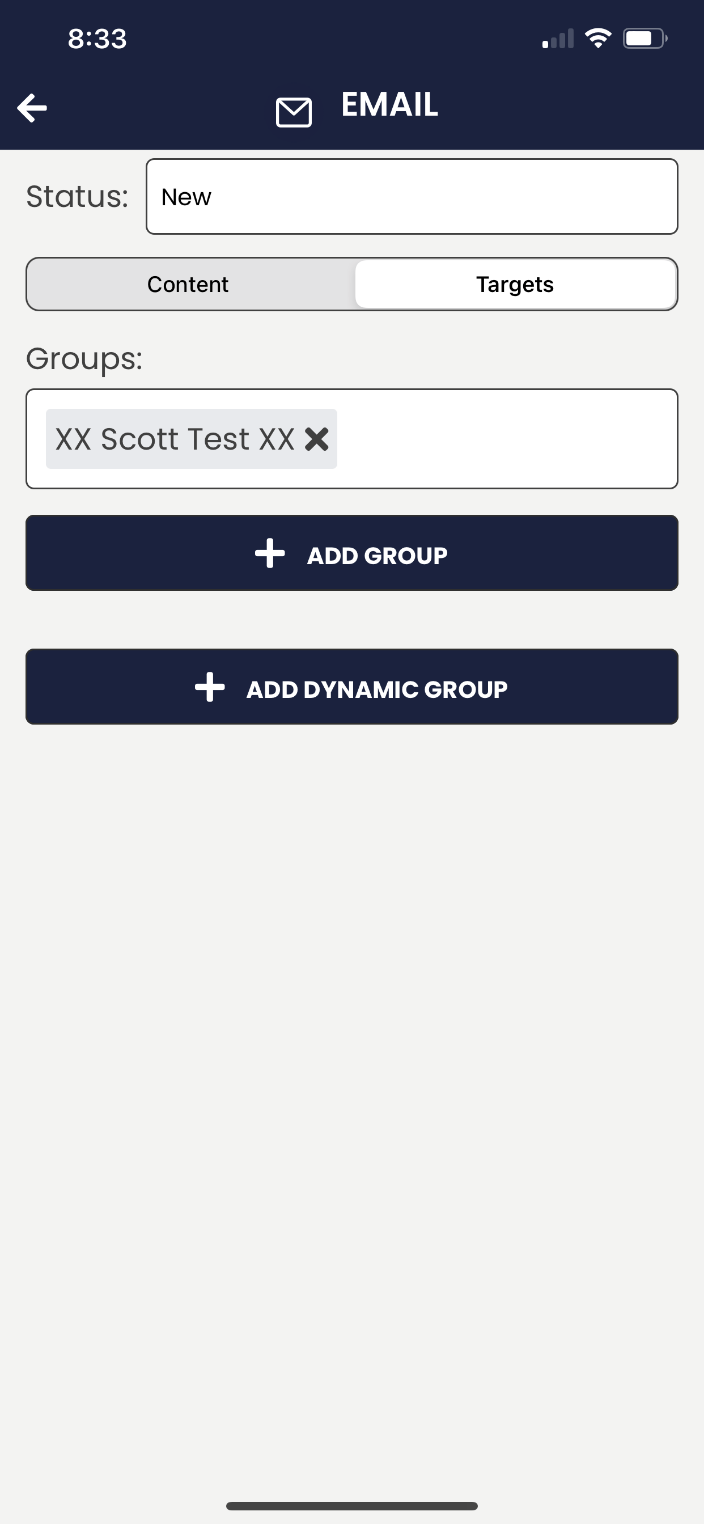
Once your Groups and/or Dynamic Groups are selected, you will see them populated on the Targets tab as shown below.
Select the arrow in the top left to go back and continue.
![]() On the Channel page, select the ( ) button if you would like to include a Geo-Targeted area.
On the Channel page, select the ( ) button if you would like to include a Geo-Targeted area.
Within the Map, there are options available to draw a Geo-Targeted area, select from pre-defined areas, and view/hide map layers.
If you have a defaulted area saved, the map will automatically zoom into that default area to make the geo-targeting process quicker.
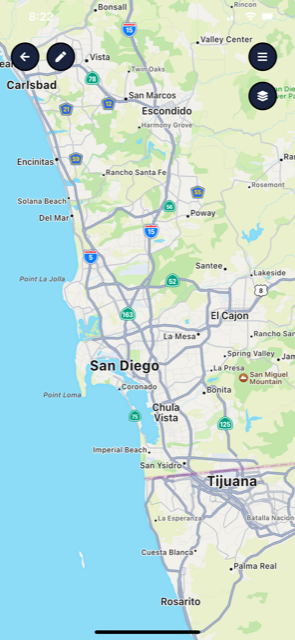
1. Back Button
2. Draw Polygon
3. Pre-Defined Areas
4. Map Layers
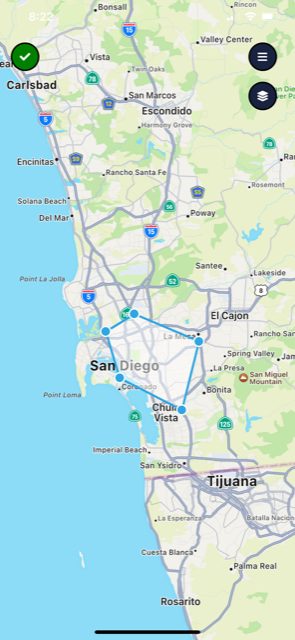
To Draw a new area, first select the Draw tool shown in Fig 1. Then tap a point on the map to start drawing as shown in Fig 2. Each tap will create a new point of the polygon. When you are finished, tap the original starting point to complete the geo-targeted area.
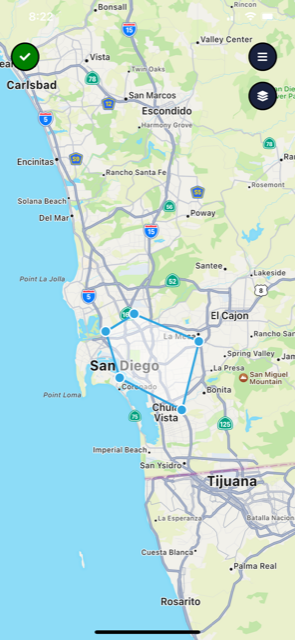
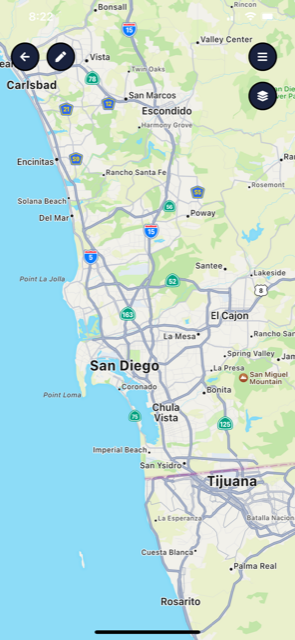
Fig 1 Fig 2
If you need to remove the geo-targeted area or start over, tap the polygon and a red Trash Can will appear. Select the Trash Can button and the polygon will be deleted.
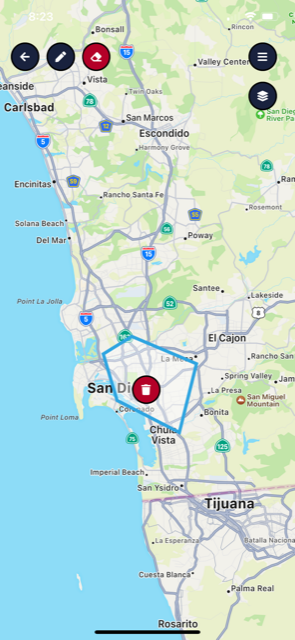
Once you are ready, select the green Check button to save the geo-targeted area.
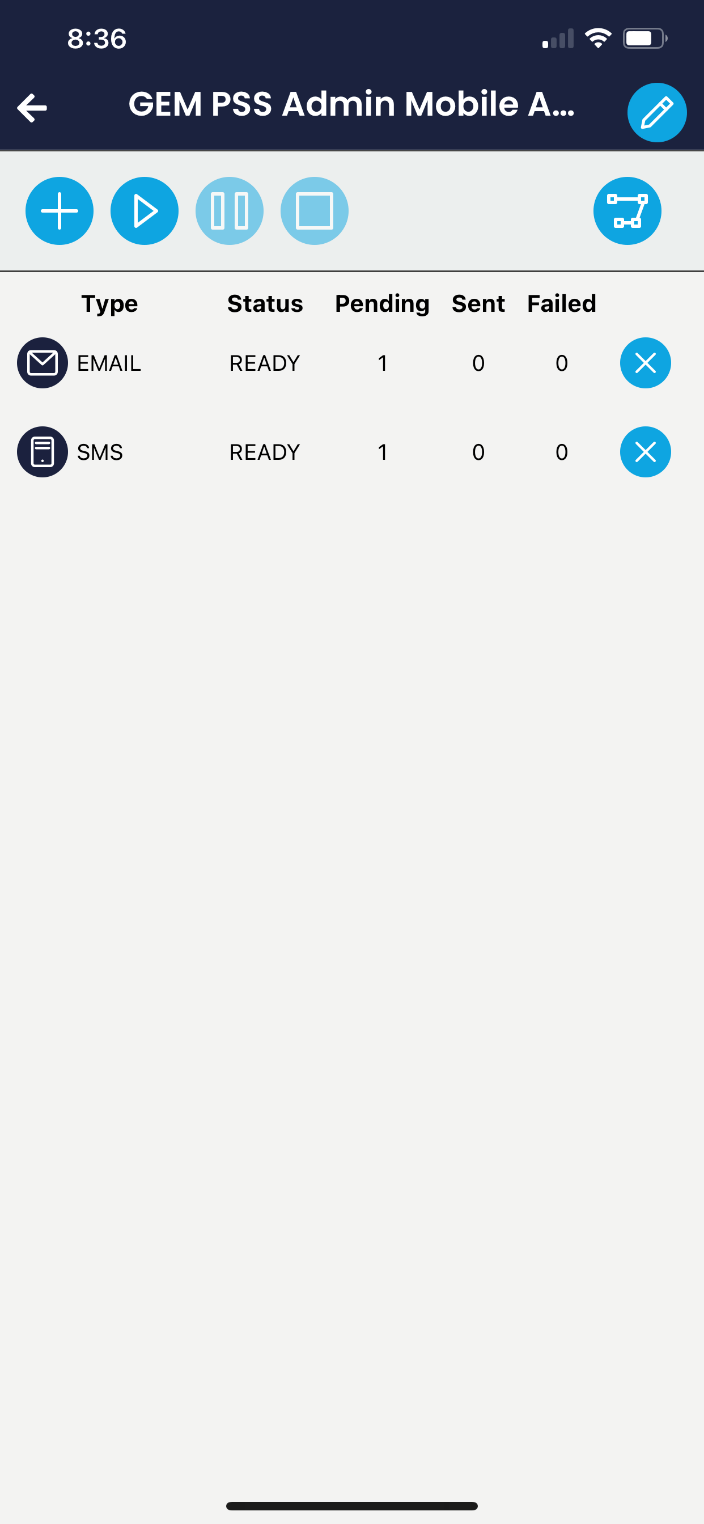
![]() You will be brought back to the Channel page. Double-check that the Channels have targets pending under each. If a Channel shows zero targets, click the ( ) button to remove that Channel.
You will be brought back to the Channel page. Double-check that the Channels have targets pending under each. If a Channel shows zero targets, click the ( ) button to remove that Channel.
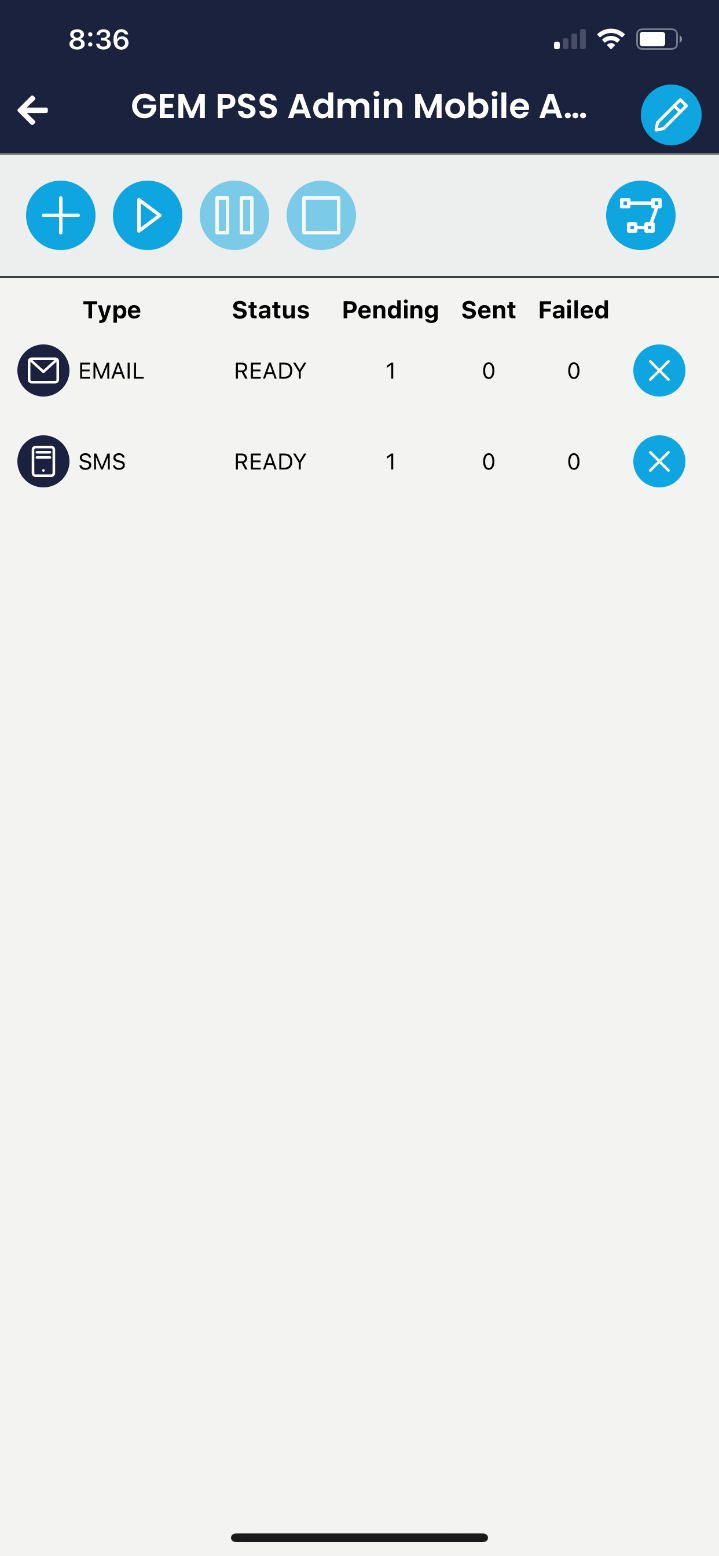
![]() To Send the alert, click the ( ) button as shown above. An Alert Launch window will appear to provide one final check to ensure you would like to send the alert.
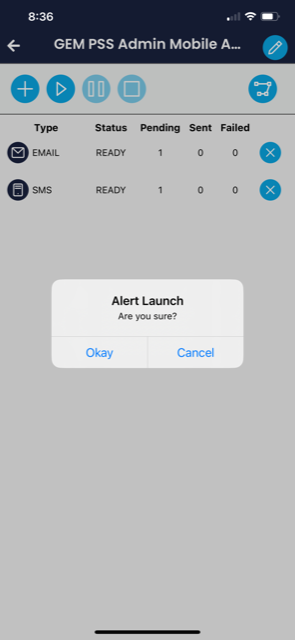
To Send the alert, click the ( ) button as shown above. An Alert Launch window will appear to provide one final check to ensure you would like to send the alert.
Click the Okay button to send the alert.
Speakers
The Speakers section will contain your LRAD (Long Range Acoustic Device) Speakers.
From this section, you can View, Manage and Deploy Sound to your speakers. Speaker Configurations are completed by the Genasys team and not through the Admin Mobile App.
To view your speakers, tap the drop down for the desired speakers and then select the Speaker Group.
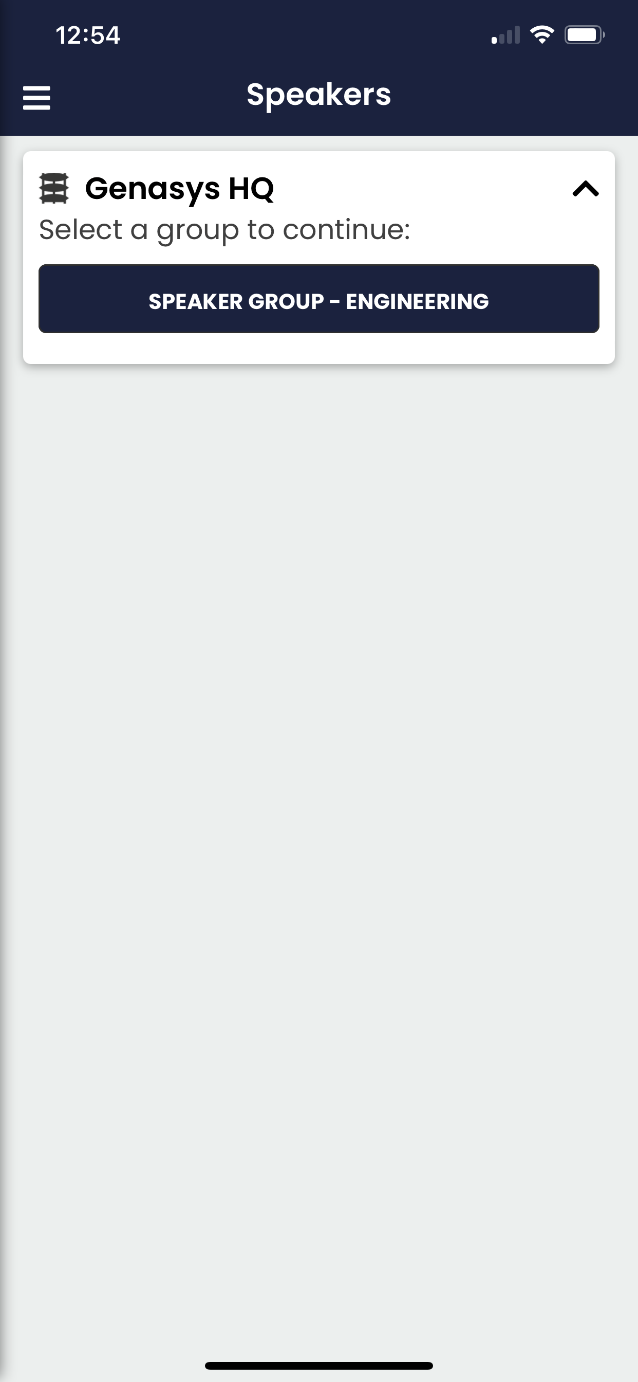
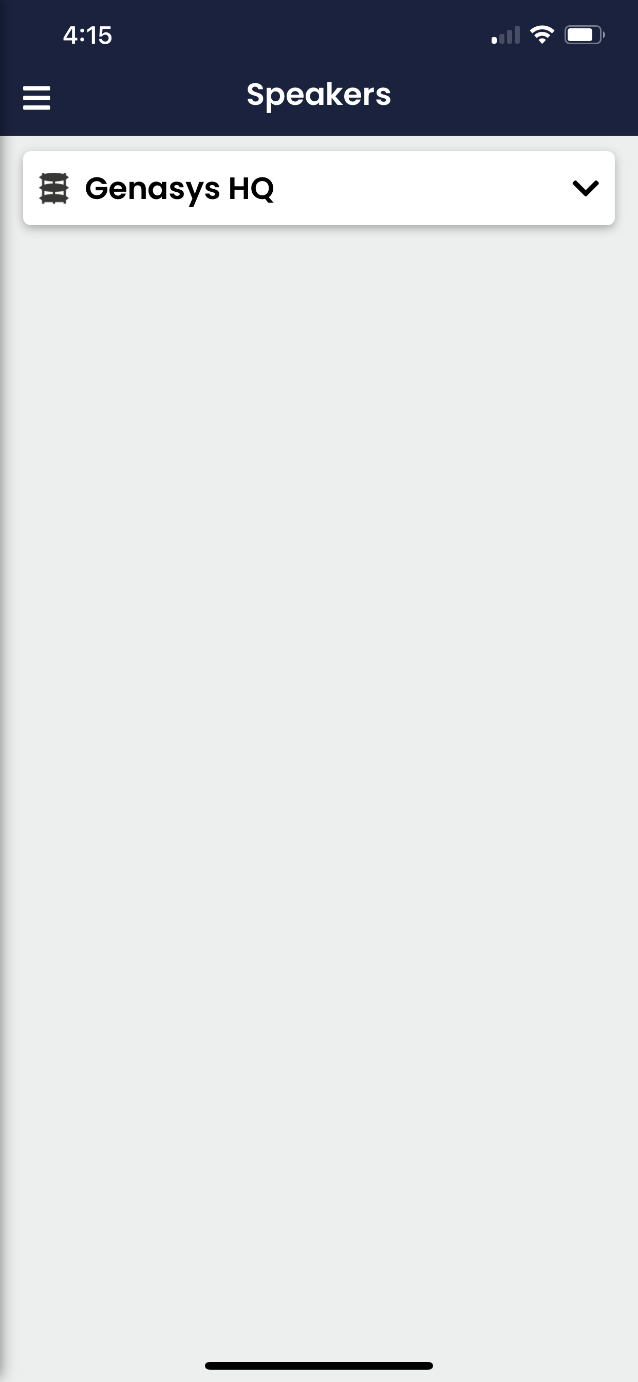
On the Speaker Group page, you will be able to select pre-created audio files, record a new audio file, allow audio files to auto repeat, adjust speaker volume, and select speakers that you would like to deploy sound to.
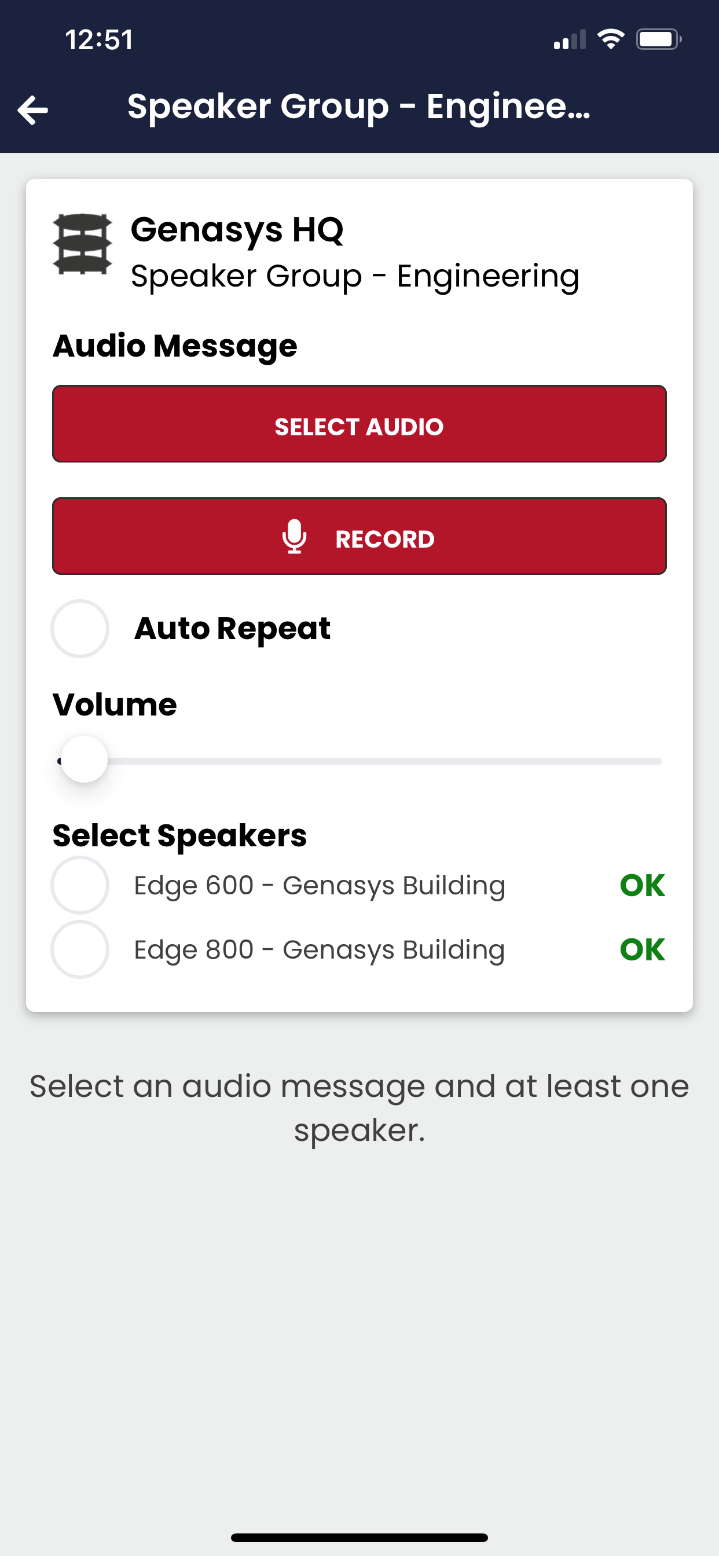
1. Select Audio- Select from pre-created audio files.
2. Record- Record a new audio file to use.
3. Auto Repeat- Set audio files to repeat.
4. Volume- Adjust speaker volume.
5. Select Speakers- Pick the desired speakers that you need to deploy sound to.
Deploy Sound
To Deploy Sound, click the Select Audio button and choose the audio file you would like to use.
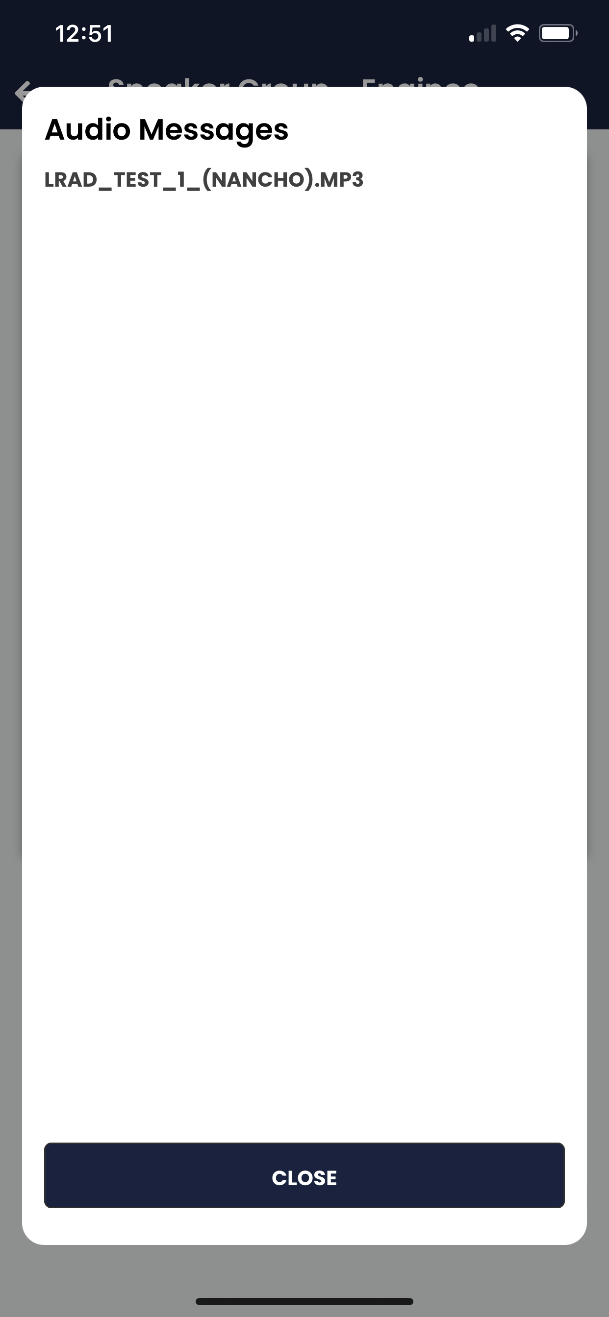
Once the audio file is selected, it will now appear in blue where the Select Audio button is located. Continue by selecting the desired speakers and then press Play to deploy the sound.
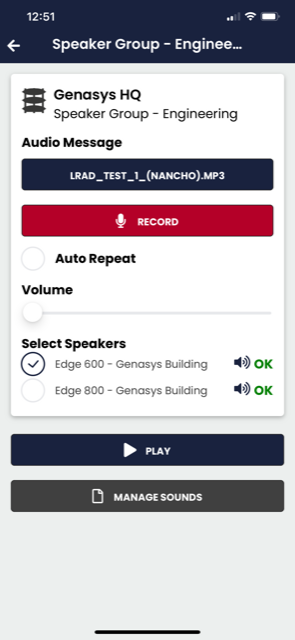
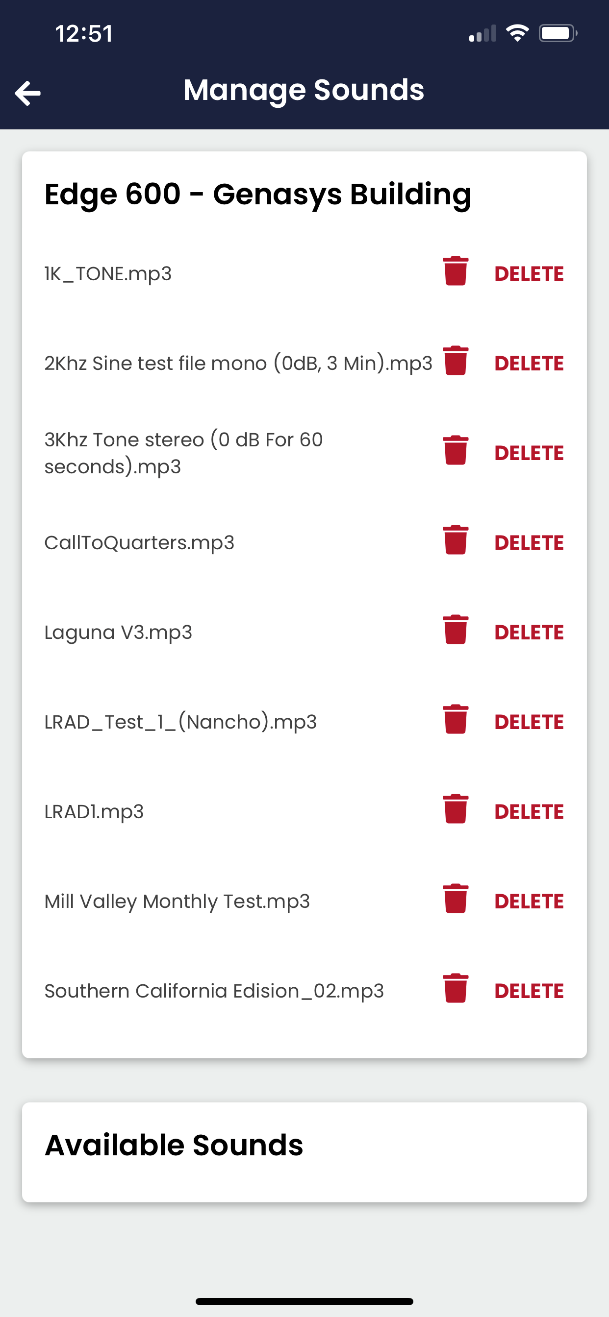
The Manage Sounds button will allow you to view, test, and delete existing audio files.
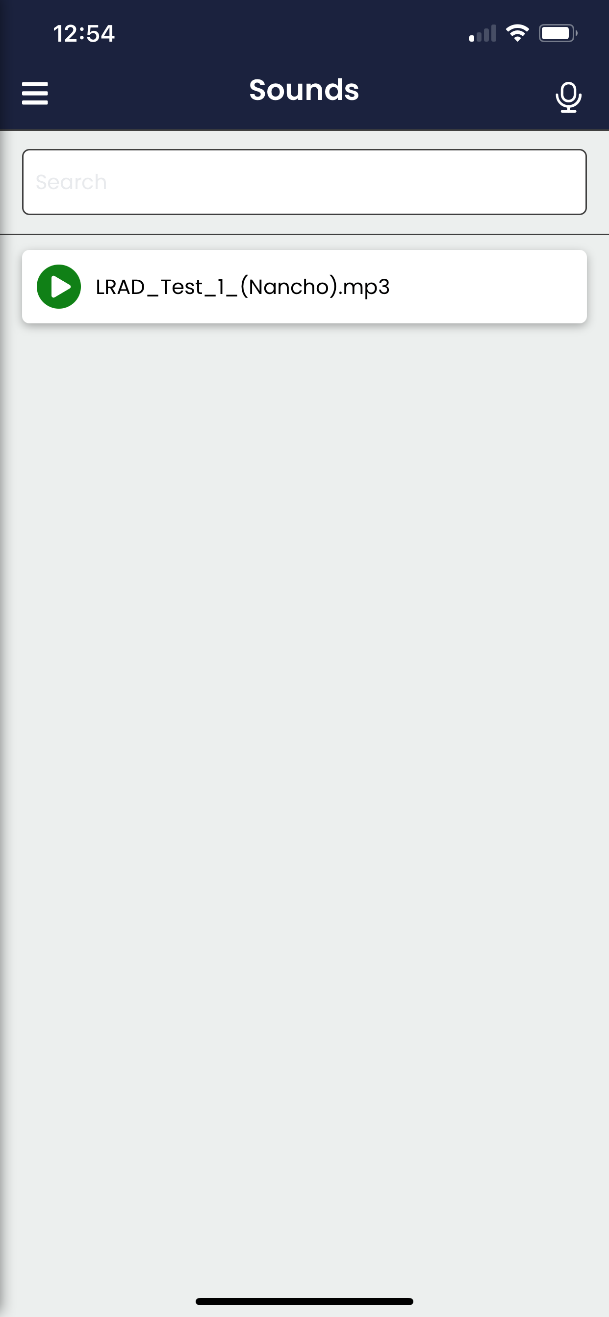
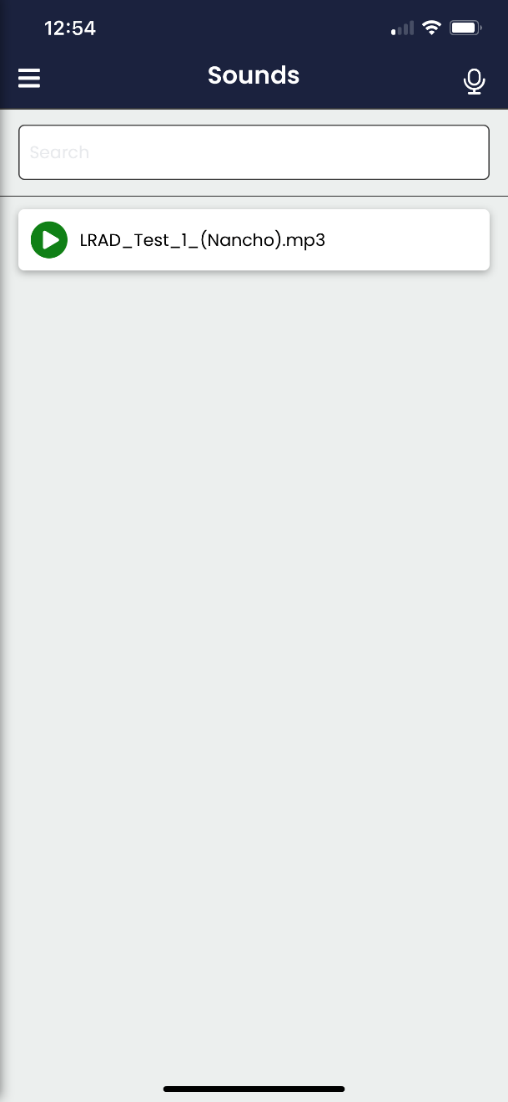 The Sounds page will contain all pre-existing audio files. Select an audio file to play the sound.
To Record a new audio file, select the microphone icon on the top right. Then Press to start recording.
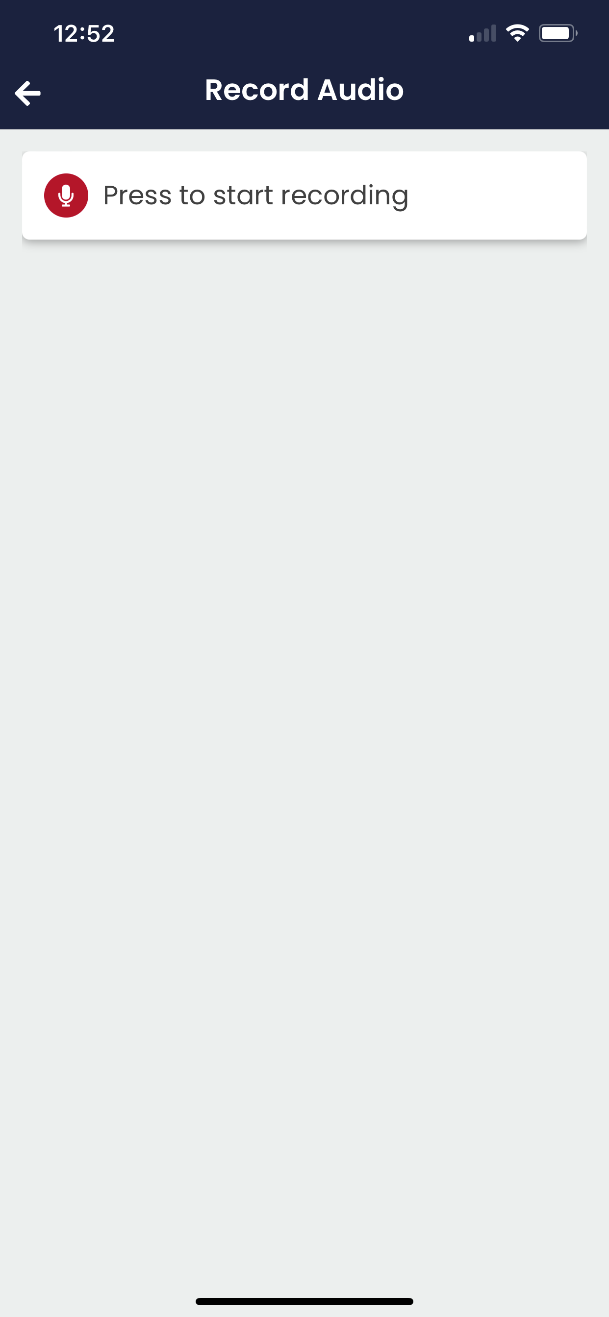
Once the file has been recorded, name the file, and select Save to Server.
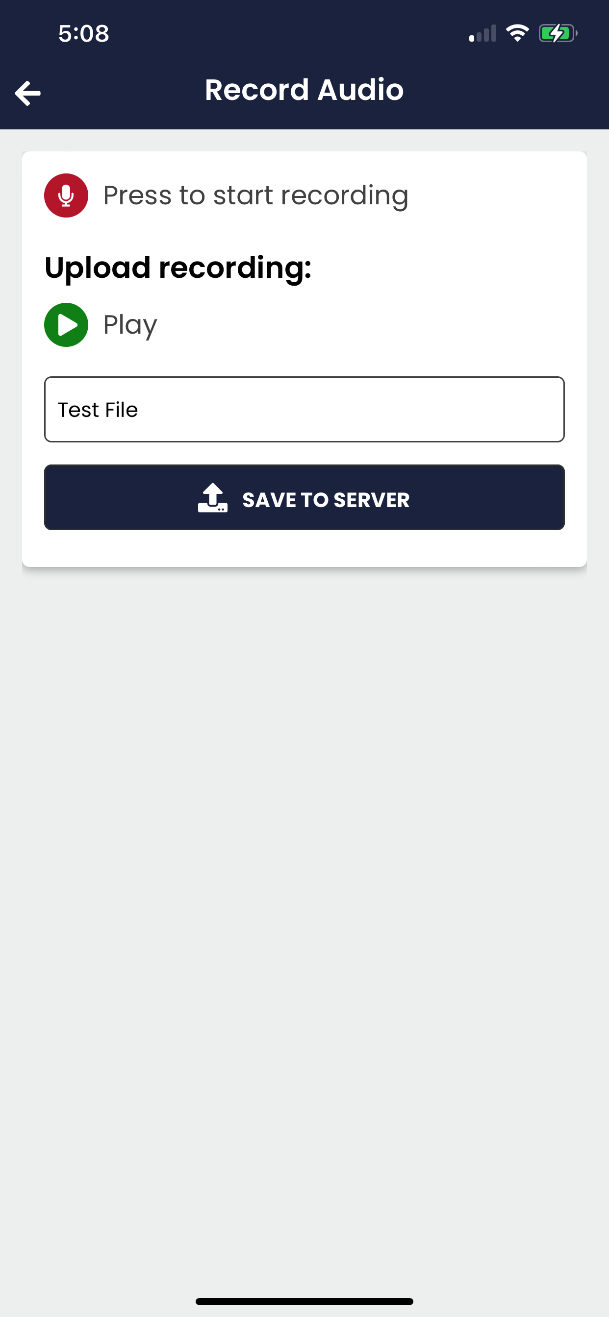
Your file will then be saved and accessible through the GUI and Admin Mobile App.
Select the Play button to replay the recorded audio file.
