Scheduling an Alert
After logging in, click-on the ‘Alerts’ section on the Toggle menu (if the Dashboard enabled), and then click-on the Alerts sub-section.
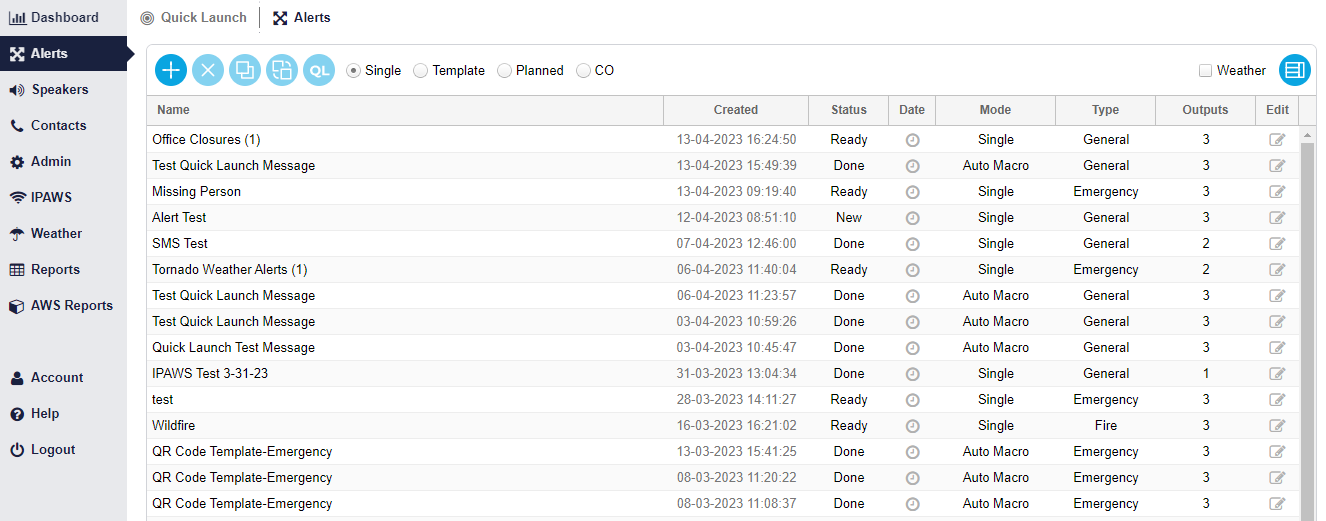
Once in the Alerts sub-section, you will need to click on the Positive (Add) button.

This will open the ‘Add a New Alert’ window. Go ahead and name the alert.
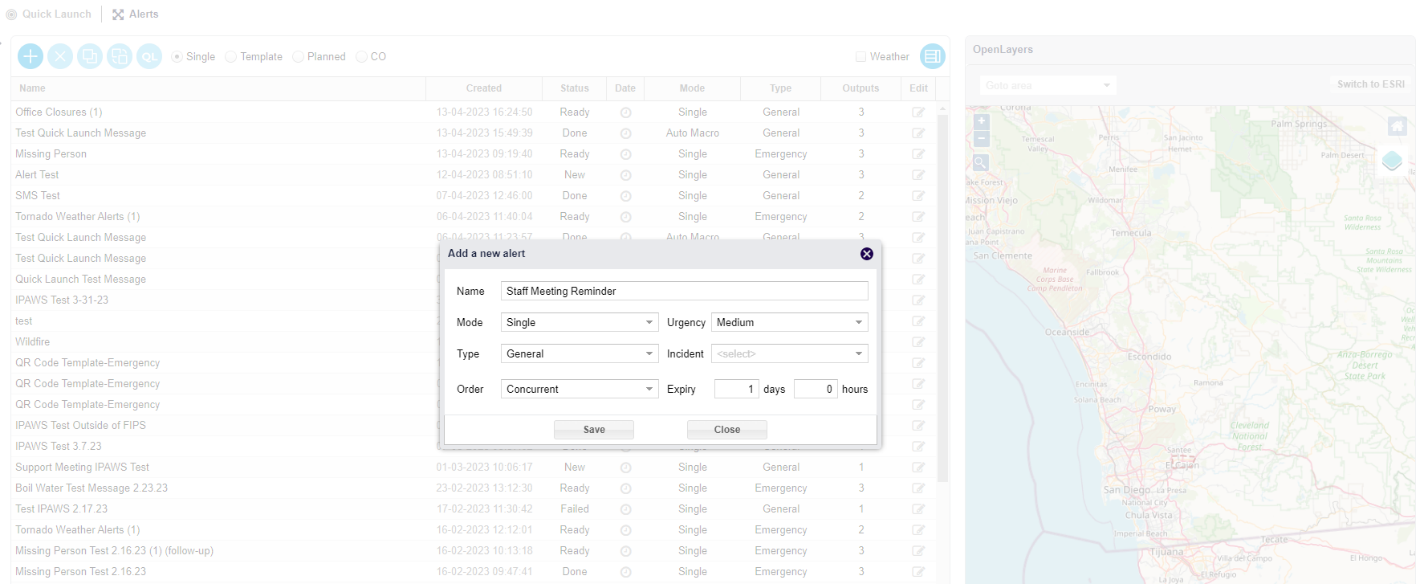
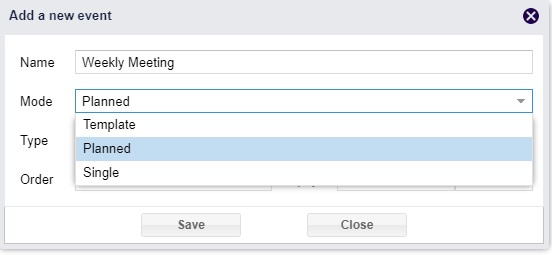
Below that we need to set the ‘Mode’, select ‘Planned’ to schedule an alert.
![]()
Then you need to select the type, order, and set the expiry of the alert. And then click the Save button. This will automatically bring you to the Planned list.
The newly created alert will be opened, and you can then go through the general steps of creating an alert. Selecting the output channels, filling in the Content text fields, setting poll options, and selecting the targets.

Once the alert is complete head back into the Planned event list, by clicking the ‘Back to Alerts List’ button.

To schedule the alert, go to the ‘Date’ column and underneath is a clock icon. Click on the ‘Clock’ icon.

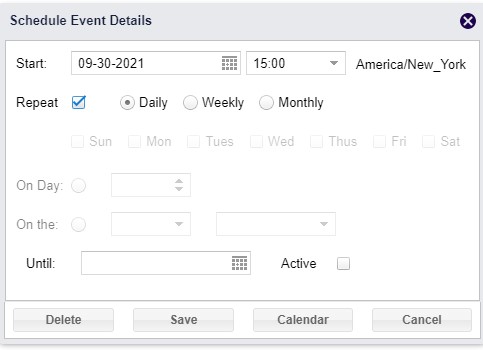
This will open the ‘Schedule Alert Details’ window. Set the day and time the alert is to go out.
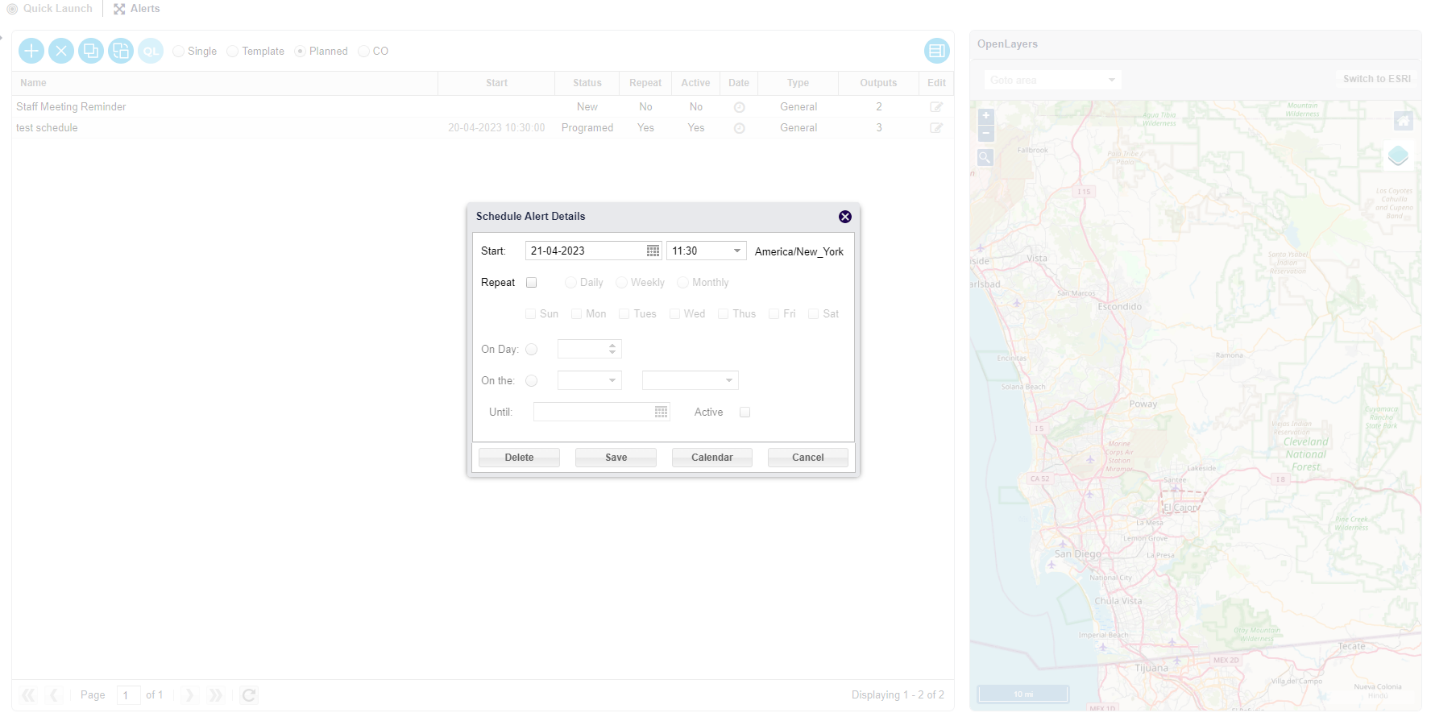
In addition, you have the option to set the alert to ‘Repeat’. Either daily (everyday), weekly (you can select the specific days), or monthly (which you can either set by the day of the month or a combination of day of the week and time of occurrence).
![]()
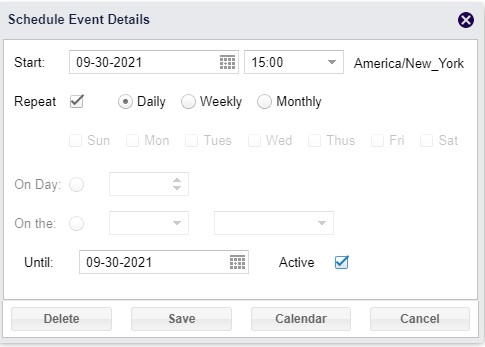
When ‘Repeat’ is selected, an end date (Until text field) must be set. In addition, the active button must be selected to activate the repetition of an alert. If not selected the alert will not repeat. The final step is to click save.
![]()
The ‘Status’ column will switch to ‘Programed’ when the alert is properly scheduled.

